
X-Wing Squadron in Sweden.
I had a lot of fun making this photo of three X-Wings from Starwars patrolling a Swedish night. I got the idea to make this image because I am working on a book on composition and I use a spaceship as a metaphor. I thought it would be cool to have a photo of a spaceship on those pages, but how do you get a photo of a spaceship? They don’t sit on every second corner.
My first thought was to use one my sons Lego spaceships (he has a ton of them). But before I acted I remembered this kind of cool shot of the ‘Space Mountain’ in Disneyland Paris and decided that would have to make do.

But I then shuffled a bit around in the photos from that area, and I noticed a photo of the X-Wing and an idea came to me. An X-Wing is a proper spaceship, just what I needed. I would put that on a shot of the Milky Way that has no foreground object or main subject, other than a bit of wood and the Milky Way itself.
I had two shots of the X-Wings from the same angle, just shot on two different days, using two different cameras. Had I known what I would need photos of the X-Wing at a later time, I would have shot a series from different angles, but I didn’t.

The original photo of the Milky Way looked like this:

This is the first shot I shot of the Milky Way. It requires an area low on light polution. This is place in Sweden is not too bad. You can see a bit of light polution just above the trees. However, the photo is not interesting in itself. There is a lack of interesting foreground.
The process of creating a believable composite
I wanted to make the illusion of three X-Wing fighters patrolling Sweden and to make that work and I could see some problems that I needed to be solved.
Problem #1: One photo is shot in the daylight, the second at night
I had to make the X-Wing fighters fall in, and I had two ideas, either a painterly cartoon-like approach or I could take a path on a more realistic look. I decided to try the painterly cartoon style first.
The photo is only a jpg, but I created two virtual copies in Lightroom and made an artificial -2 and +2 for an HDR processing workflow.
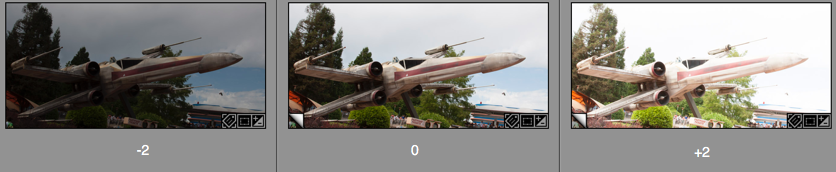
These three I put into my HDR software and got out a tone mapped HDR version. If the image, like this one, is shot in a low dynamic range situation like here, you can get fine results, when you tone map an image like this. It is only a pseudo HDR, but you still get the look from a real HDR.
At this time, I did not notice; but have a look at the darker image. That fits just perfectly into a night image. I figured that out later, but I only noticed this, because I had made this darker -2 version of the image. And that is the one in the final image.
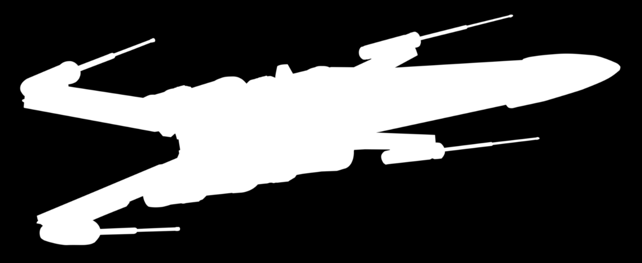
Problem #2: Masking out the background from the X-Wing
The X-Wing is a pretty regular shape, and it is not too hard to cut out using the Pen tool. The Pen tool can create a Path, which can be converted to a very sharp mask, but it takes a little practice to use.
But for an object like this X-Wing, it was the only real option. I tried some of the magic tools in Photoshop at first, but it just didn’t work well enough in this situation.
The Pen tool you will find here:
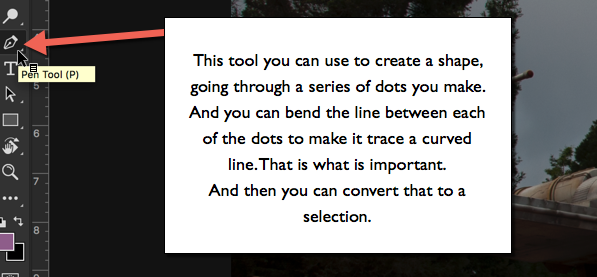
The Pen Tool allows you to set a series of dots. Photoshop will play “connect the dots”, and if you end up closing the line, you will have a shape. That shape you can convert to a Selection.
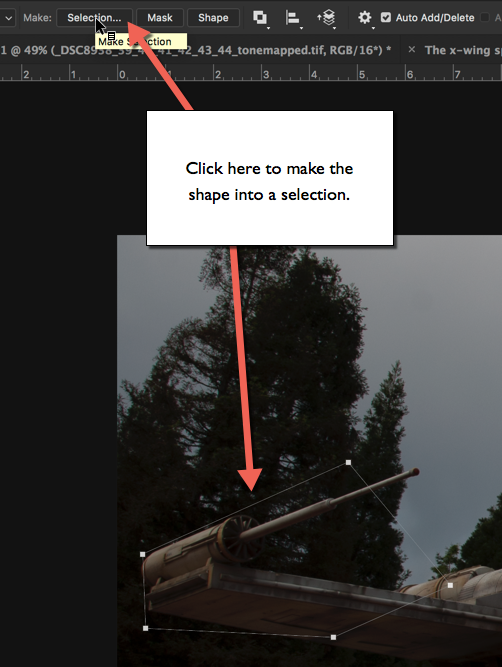
You get some options before you get your selection.
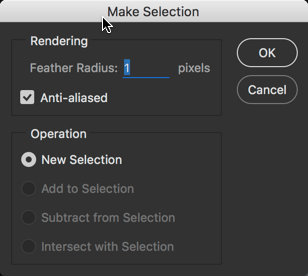
Starting from the bottom, you want to create a ‘New Selection’, and you also want to have it on ‘Anti-aliased’, because it makes a smoother transition between the neighboring pixels on the edge.
And the first option is ‘Feather Radius’. If you set this to zero, you will get a very hard edge, and it will not blend very well with a background. Typically I use values between 0.5 and 2, depending a bit on the size of the object, the resolution and what it is. For the X-Wing I used 1-pixel feather radius, and that looks great.
How to use the Pen Tool in Photoshop?
This takes a little practice before you get the hang of it. Start by setting the first dot at a location good for closing the path to a shape. A corner is always a good place.
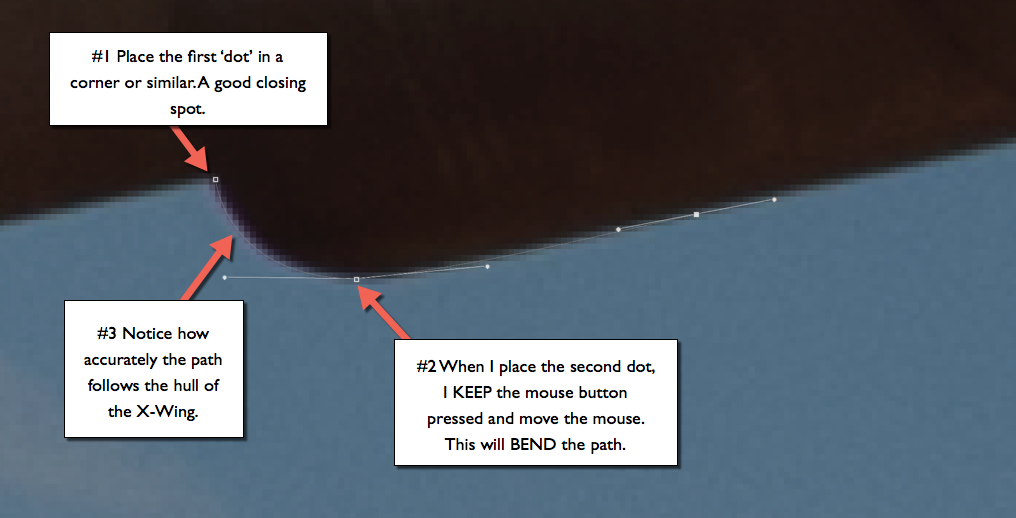
When you place the second dot DO NOT let go of the mouse button. Keep it pressed and move the mouse, notice how the path begins to bend, depending on how you move your mouse. Use this to make the path follow the shape, you want to have a mask for.
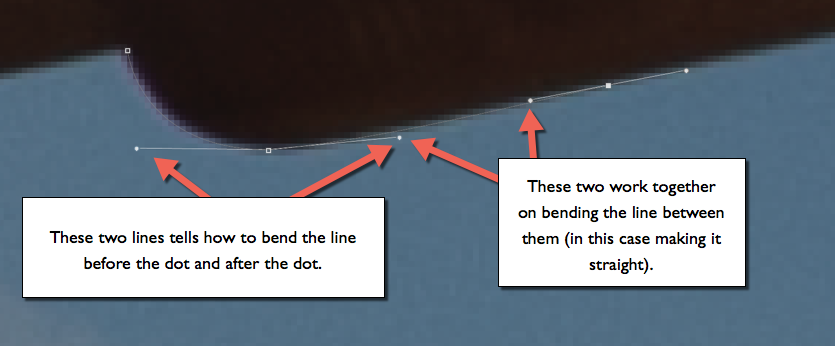
You also get two additional lines (handles). The handles tell Photoshop how to bend the path. Each dot has two handles, one for bending the path before the dot, and one for bending the path after the dot.
The path between two dots is controlled by two handles, one from each dot.
Moving handles: A handle can be moved if you carefully position the mouse exactly over the handle and press ALT. Then you can drag it around and change the path. It is necessary to use this in corners and whenever there is a need for a sudden change in the direction of the path.
And when you miss the handle, just press Undo. You will miss it 100 times because it is small.
Moving a dot: You can move a dot if you press CMD on a Mac or CTRL on PC. Again, be careful to place the mouse exactly on top of the dot, and as with the handles use Undo, whenever you miss. And you will miss.
It takes a little practice, but as soon as you get going, you can make a perfect mask for the X-Wing in less than 30 minutes.
Problem #3 making a seamless composite
As mentioned in Problem #1 I ended up using the darker exposure, and when I added the mask (just press the ‘add mask’ when your selection from the path is active), the X-Wing appeared on top of my Milky Way. As you can see in this 270% crop, the transition between the X-Wing and the background is seamless. This is because of the ‘Feather Radius’ of 1 pixel, as mentioned in Problem #2.

I made three duplicates of the X-Wing layer, and resized and rotated them a bit, to make them look like three individual X-Wings. I also distored the shape slightly, but not too much. Too much would be obvious, because the perspective would be distorted.
The second part is to make the light match both in intensity and colors. The original X-Wing is shot in daytime, and the colors match a daytime.
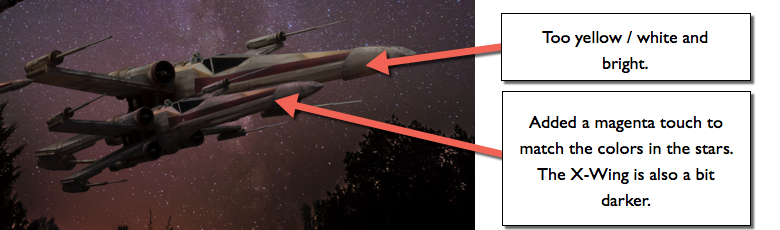
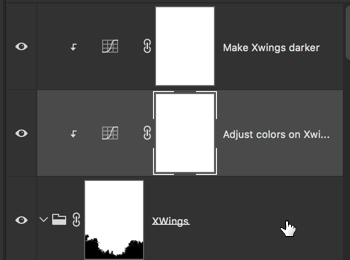
To make it fit better I change the colors, using a curves layer. I have organized my three X-Wings in a Layout Group. I can target any adjustment layer to only the the layer just below, and if that is a Group of layers, they will all be targettet. But my background will not be targetted.
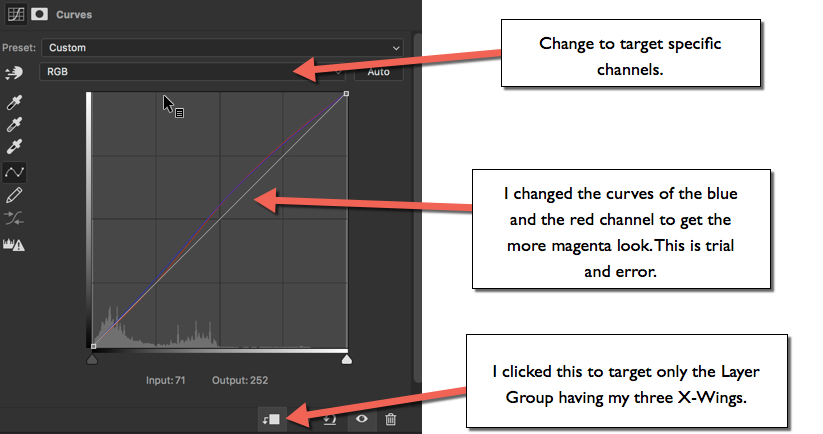
I also have a curves adjustment layer to make the ships slightly darker.
The X-Wings now have a good and transparent blend with the background.
Problem #4 placement of the X-Wings
I decided to go with the idea of three visible X-Wings on a patrol. It should look like they are flying at a low altitude, and just flying over the woods as I shot the photo.
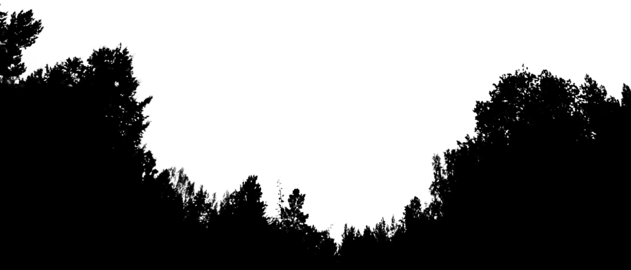
The third X-Wing would have to be half hidden by the trees to make this work. To make this work I needed a mask for the trees only, to hide the part of the X-Wing that should look covered by trees.
In the latest version of Photoshop CC 15.5 there is a new Masking tool, and using that, I pretty quickly got a usable mask for the trees.
The new masking tool is accessed by using:

And putting this mask on top of the X-Wing Group allows me to half hide the third X-Wing behind the trees and the illusion is complete.
Thanks for reading
If you enjoyed reading this article, you might also enjoy my latest book “10 Essential Tips for Fine Art Photographers“. What you get from the book, that you don’t get from the blog is the mindset and organized rock solid tips on how to become a Fine Art Photographer producing professional images.
–Jacob