Warning: Undefined array key "multiauthor" in /var/www/caughtinpixels.com/public_html/wp-content/plugins/post-layout/plugin.php on line 114
Warning: Undefined array key "mobile" in /var/www/caughtinpixels.com/public_html/wp-content/plugins/post-layout/plugin.php on line 352

In 2018 I only made one blog post for Caught in Pixels. I did write a handful for DigitalPhotographySchool.com though. But 2018 was in many ways a strange year. Far too many things happened in my life and very little time was available for writing blog posts.
It is an ambition of mine, is that 2019 will be different. My goal is to write more blog posts for www.caughtinpixels.com.
The first topic I thought I would cover is Color Harmony. It is something, that I have spent some time investigating and understanding over the past couple of years and have become increasingly fascinated by it. It is something that you can use intentionally and it can make quite dramatic changes to the perception of a photo.
Color theory and color harmony were formalized by painters way back long before the invention of any camera let alone cameras that could take colored photos. Nevertheless, it is still highly relevant and also to photographers.
When you have begun to understand color harmonies, you will see them anywhere you look. You will find them in commercial photos, old and new paintings, movies – literally everywhere.
When you photograph cityscapes and landscapes like I mostly do, you can sometimes find natural color harmonies and photograph them, but more often than not you can’t control the colors of the environment.
You can make some choices on what to include and what not include, but the general mix of colors you can’t change at the time of photographing. Sometimes, you can change the time which you photograph, like nighttime, daytime, blue hour, golden hour, autumn, summer, spring, and winter, but even that is not always possible and you get what you get.
Very often you end up with photos that are not in perfect color harmony and you will have to create that in the post-process. That is what this blog post is about.
Colors and moods
Colors can change the mood of an image. Colors like yellow, orange and red are considered warm because they give a warm feeling. Blue and cyan, on the other hand, are cold colors. You can intentionally use warm or cold colors to make your image convey the mood you want it to.
A good and simple way to change the mood is to simply to shift the white balance either towards the warmer or colder temperatures. This can often also push the image towards a color harmony, as you will see later.
What is a color harmony?
Color Harmonies are colors that look good together. There are many different systems to create
The Adobe color wheel shows how the Red, Green and Blue (RGB) colors can be mixed to any color. On the opposite side of the wheel you can see the complementary color. The complementary colors to the primary colors are:
Blue has Orange as complementary color.
Red has Green as complementary color.
Yellow has Purple as complementary color.
The purpose of this article is not to explain Color Theory in details, but rather to show how change the colors of a photo to have a color harmony. If you want to get a deeper explanation of Color Theory and Color Harmonies, I find Blender Guru’s video very explanatory.
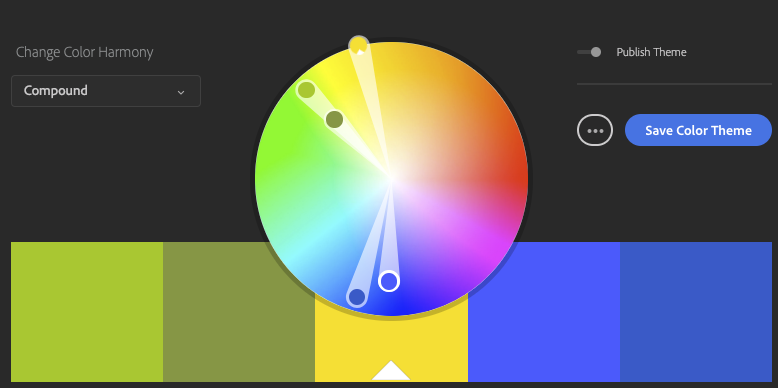
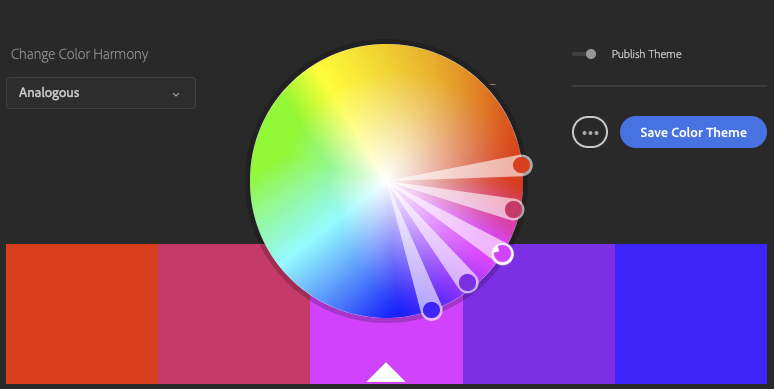
In Adobe’s color tool you can put together 5 colors based on a Color Harmony Model and those colors will be a good match. If you pick Triad as shown below you get three hues with an

By fiddling around you can find various color harmonies that you like and try to use them in your photos. It also holds a huge library of Color Harmonies, which you can if you like. Personally I don’t use them.
Color harmony is a bit like a chord in music. You can make some that are more harmonious than others, but somehow, they always fit together.
What you find out after having used color harmonies consciously for a little while, is that as soon as you get a color harmony, something incredibly amazing happens to your photo. It’s like it reaches another level and gets pleasing and calm. It is not without a reason it is called Color Harmony.
In some cases, it can be the difference between ‘just a photo’ and a pretty cool photo. Another er weird thing is that the colors do not even have to match reality … not at all!
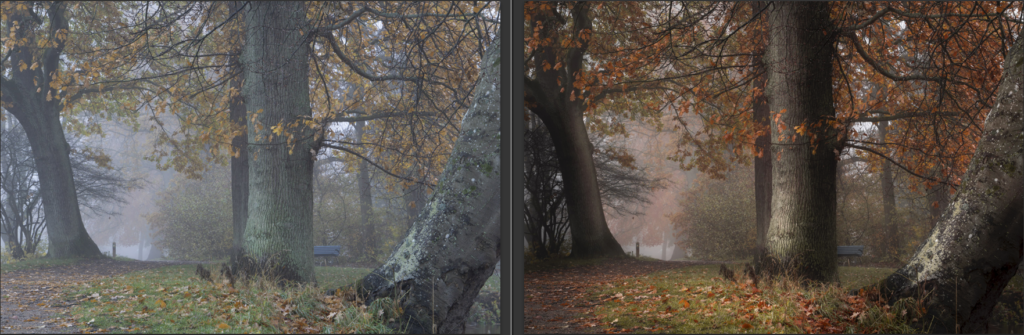
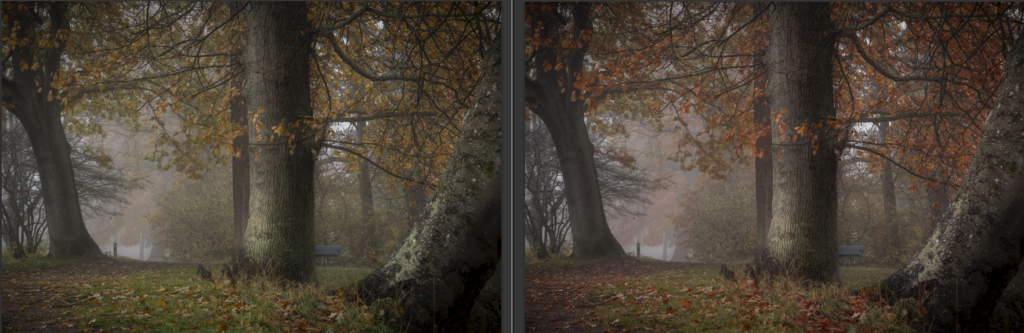
Have a look at this photo from in a forest in Denmark. This mist will never look that color, yet, because the color of the mist is in harmony with the leaves and it works out just great.

How to Create a Color Harmony?
The trick is to twist the colors into a color harmony. This can be done in many different ways and it is called color grading.
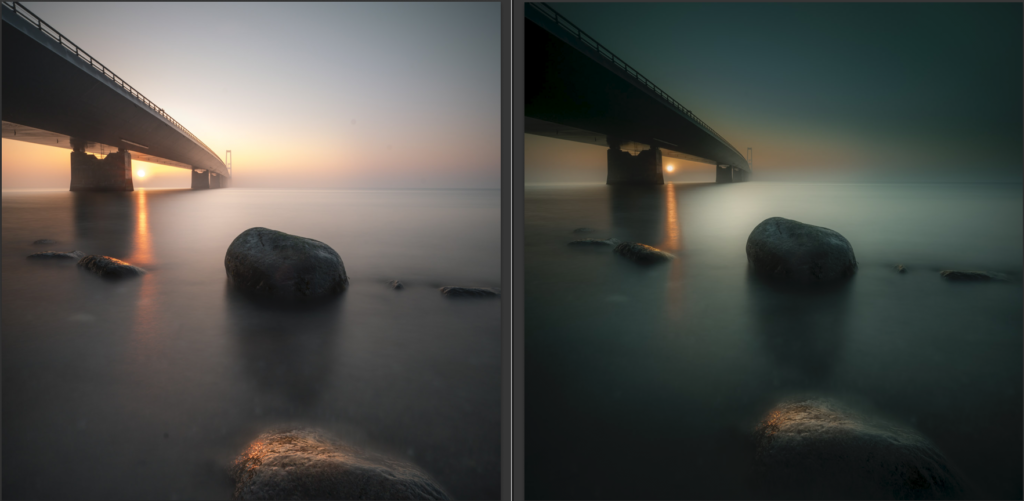
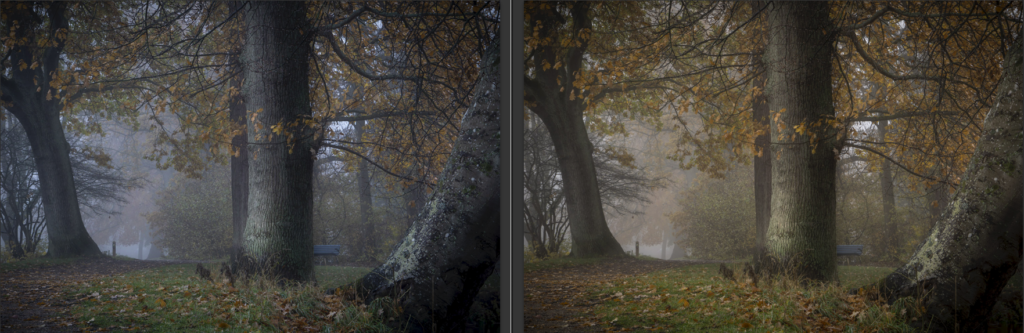
I will show you a couple of easy ways available in Lightroom to color grade your images. This is the before and the after:
My goal with this image was to get a dark and warm ‘feel-good’ forest image. I did some simple basic image editing before I began working with the colors.
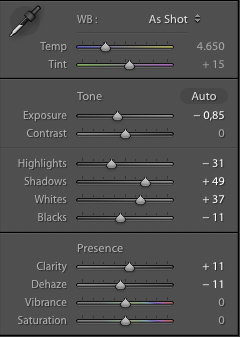
White Balance
Normally you would probably not see White Balance as a color grading technique, but it does change the colors of a photo
The colors straight of the camera are on the cold side, but by shifting the White Balance towards the warmer segment it gets closer to what I want.
I suggest that you begin by adjusting the White
The White Balance has been warmed slightly, to push the colors more into the Yellow and Orange color range, in which I want the image to end up in.
Color Adjustments using HSL
There are so many different ways to tune your color harmony, one of the best and simplest yet also most effective ways is use the Hue, Saturation, and Luminosity (HSL) panel in Lightroom.
The HSL panel, not surprisingly from the name, allows you to change the hue and saturation (and luminosity) of individual colors and this way you can nudge them into a color harmony.
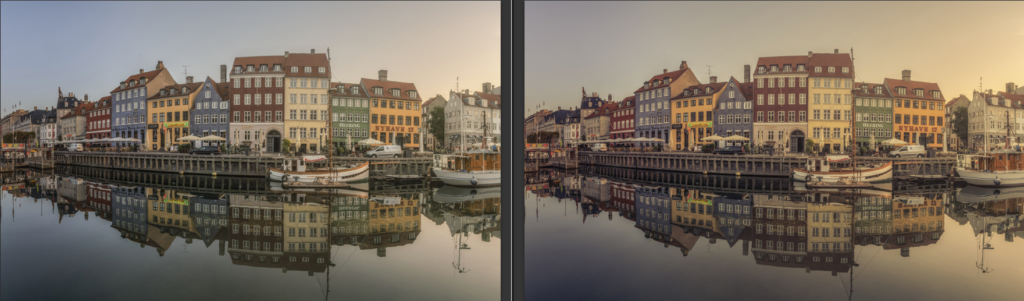
In the example below I have used exactly the same basic image editing on both images (highlights, shadows and contrast), except for White Balance and HSL settings.
After having adjusted the White Balance you go to the HSL / Color panel in Lightroom and begin to push the Hue sliders to the left and right accordingly to what you want to achieve. Below I have pushed the colors towards Orange and Yellow.
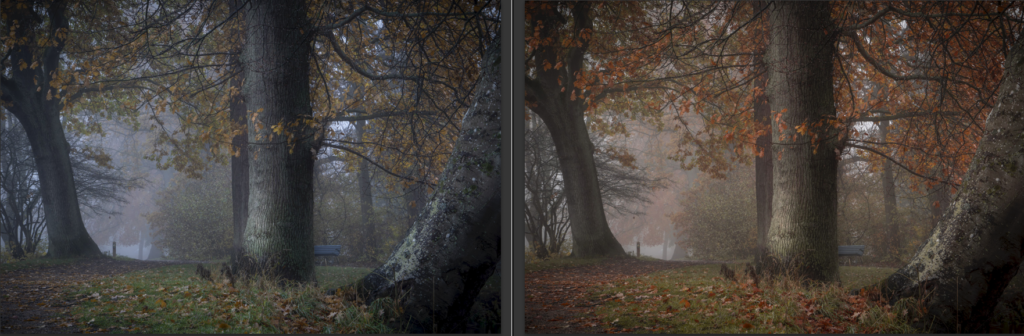
Then you adjust the saturation to balance the saturation or take out a color of the equation. I remove some of the Blue because I found it too dominant.
The image on the left is not bad, but the one on the right has a better balance – a better harmony. It not only because it is warmer it also has a subtle, yet important, color balance.
These are the HSL settings I used:
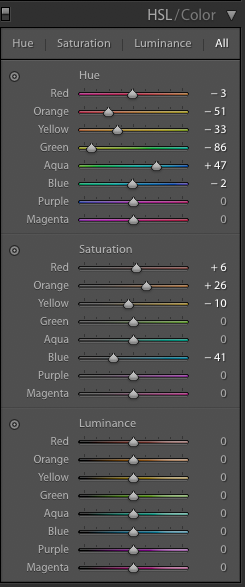
The White Balance is a part of the equation above, but I can take it out of the equation by making the same warmer White Balance settings on both images. Now you see the difference the HSL settings do.
Essentially there is no right and wrong, but if you want to achieve a perfect color harmony, you can get a lot out of the HSL panel, by tuning the individual colors.
Some images will need more bending than what the HSL will allow, and then you will have to turn to other methods, like local changes using brushes and gradients or even taking the image into Photoshop.
Split toning to add color harmony
You may have heard of split toning. It is a more creative way to work with your colors and it can be very dramatic, but it is a tool you should use with care.
Split Toning is a process where you add one color to the highlights and add another color to the shadows. If you do it in a subtle way, it will hardly be noticeable, but it can make a difference. If you do it more aggressively it will make a strong impact on your image, for better or worse.
You can create Split Toning in many different was. In Lightroom, it is very easy from the Split Toning panel.
In the first example, I have first turned it into black and white photo and then I have colored it using the Split Toning. I have added

And these are the settings.

The colors you add, might not be natural even if they are very pleasing to the eye. This is a creative decision for you to make.
Here is another example. Same principle – first black and white, and then split toning it.

While split toning is an incredibly powerful tool and can be used to create fantastic creative colored photos it is not always enough to create color harmony.
My personal preference is to use Split Toning later in the process to see if it can add just that spice, that makes the difference.
I have a strong belief about image editing: you cannot do everything in one big step. The is no silver bullet, no one-button image processing. It is the many small steps, that may be tiny, that adds up to the big change.
In the example below, the same split toning is added to the colored version of the photo. It changes the photo into a warmer photo.
And if you look at Color Harmony, it is the one showed earlier.

–Jacob