Warning: Undefined array key "multiauthor" in /var/www/caughtinpixels.com/public_html/wp-content/plugins/post-layout/plugin.php on line 114
Warning: Undefined array key "mobile" in /var/www/caughtinpixels.com/public_html/wp-content/plugins/post-layout/plugin.php on line 352
 and merged them in Photomatix Pro.")
This is one of my very first HDR shots I shot. It is shot hand held with my old Canon 400D and the old 18-55mm kit lens. I think this photo is a proof that it doesn’t take professional gear to make great photos. I shot three exposure bracketed shots (-2, 0 and +2). I shot it in june 2012, before I really knew anything about HDR or post processing.
What’s most interesting about the post-processing is the mirroring of the lower part of the image. There was a large container like construction I couldn’t avoid having in the photo. I tried another angle, but that didn’t work, so in the end I shot with the construction included.
I have did the tone mapping and really liked the result, but I didn’t like the construction, so the photo has been lying around for some time, and then recently I picked up the photo again, and tried to remove the construction.
This is the original:
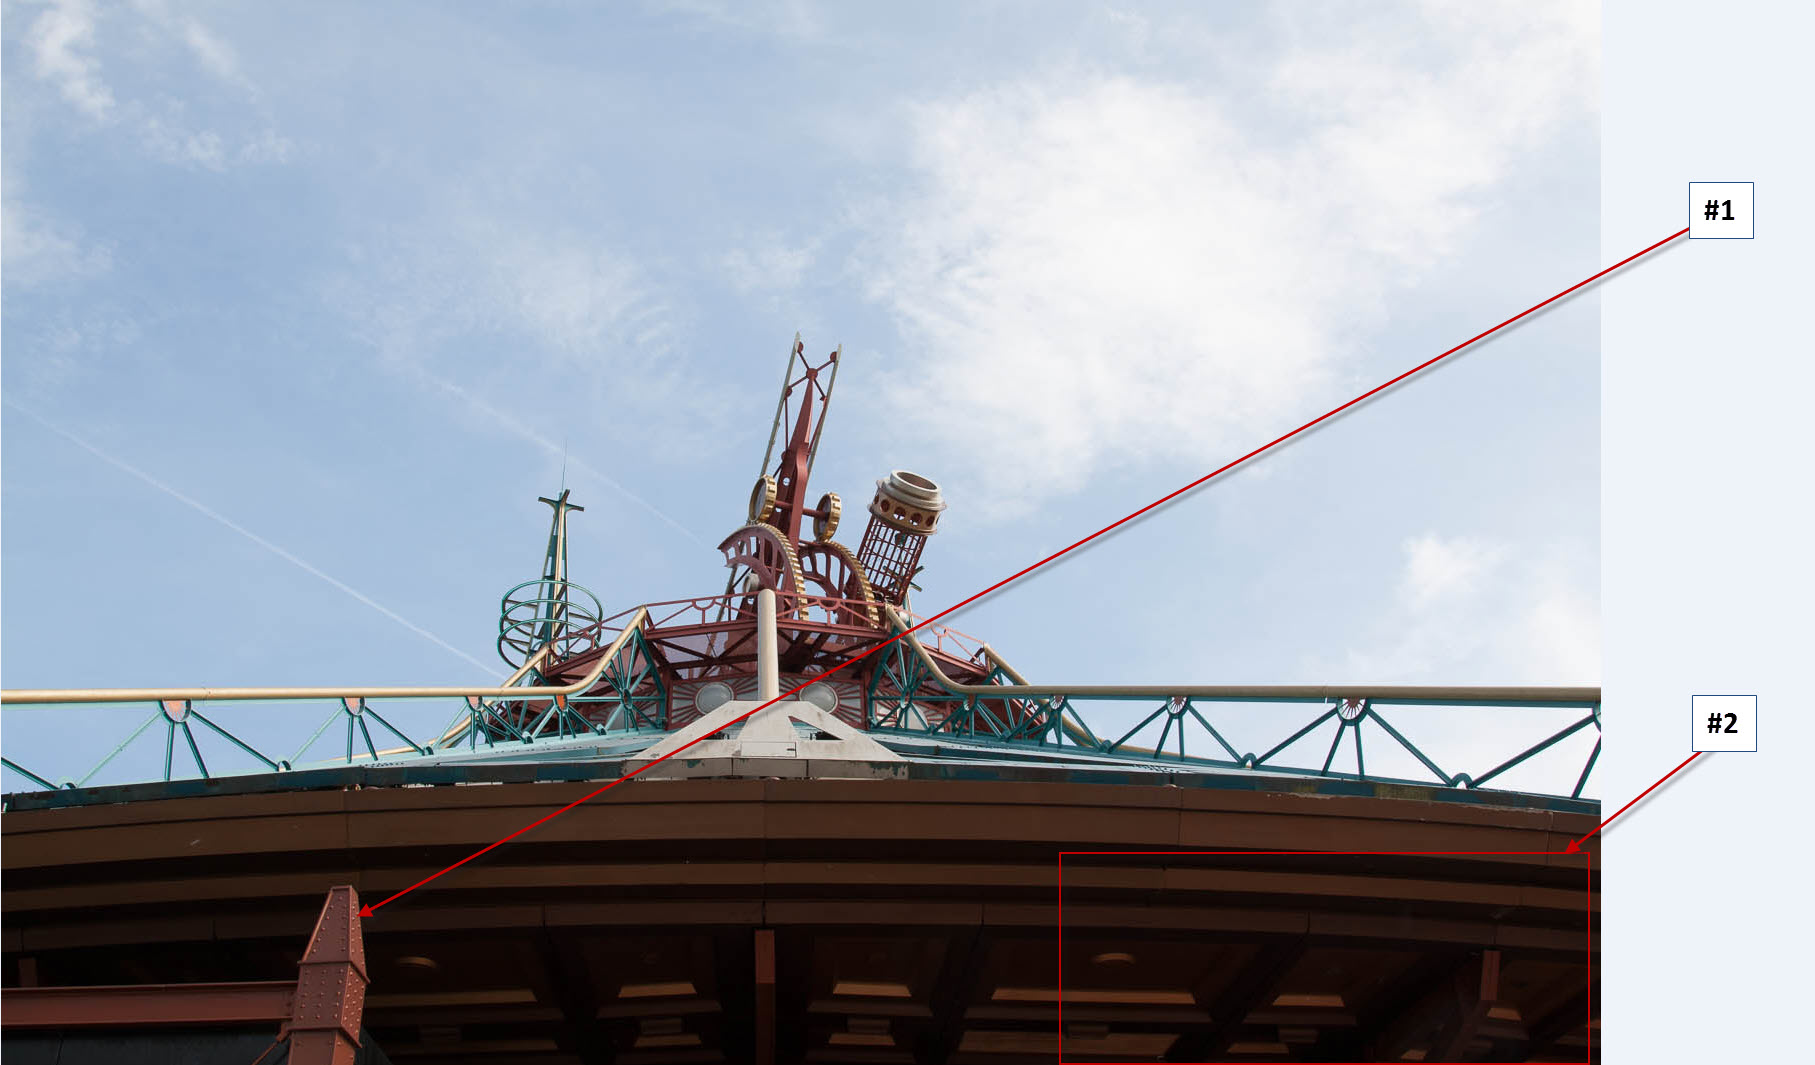
#1 This the top of the ugly construction and it ruins the photo.
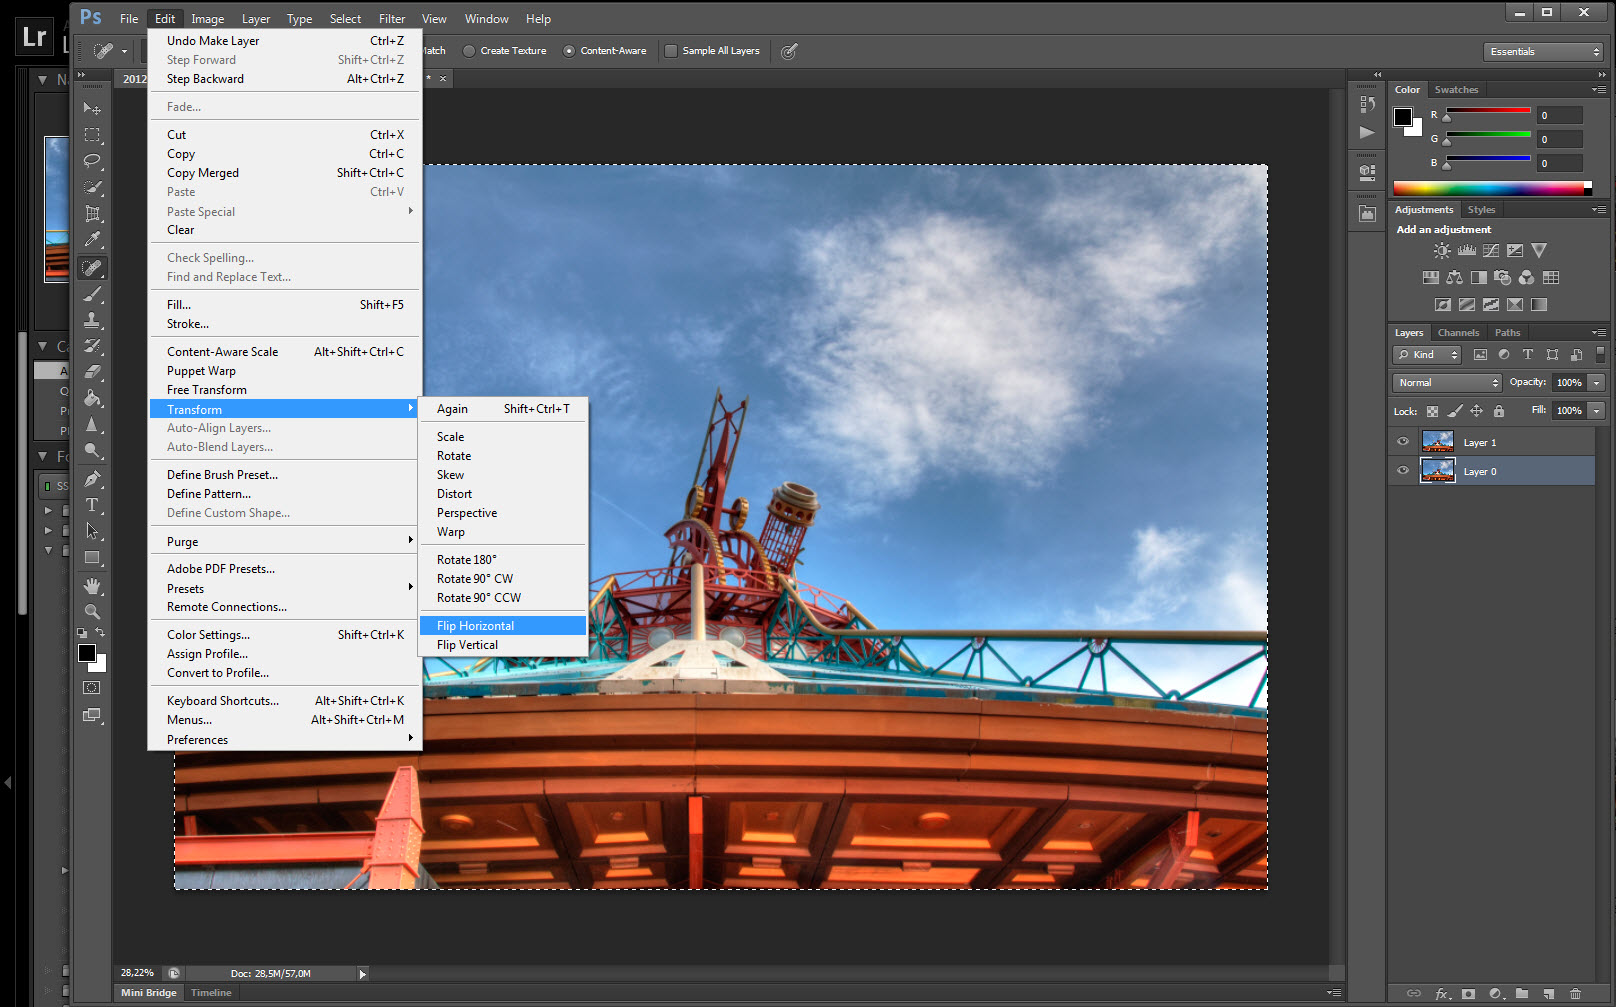
#2 This part of the image I mirrored and merged into the right hand side. The photo is close to 100% symmetric, but I had to do a little shuffling around the pixels to get it to look well enough to deceive the eye. There are probably many ways to do this, but the way I did it, was to load the image into Photoshop, and then duplicate the layer (CTRL+J) and then select the lower layer and press CTRL+A to select all of the layer. And then I flipped the layer like this:
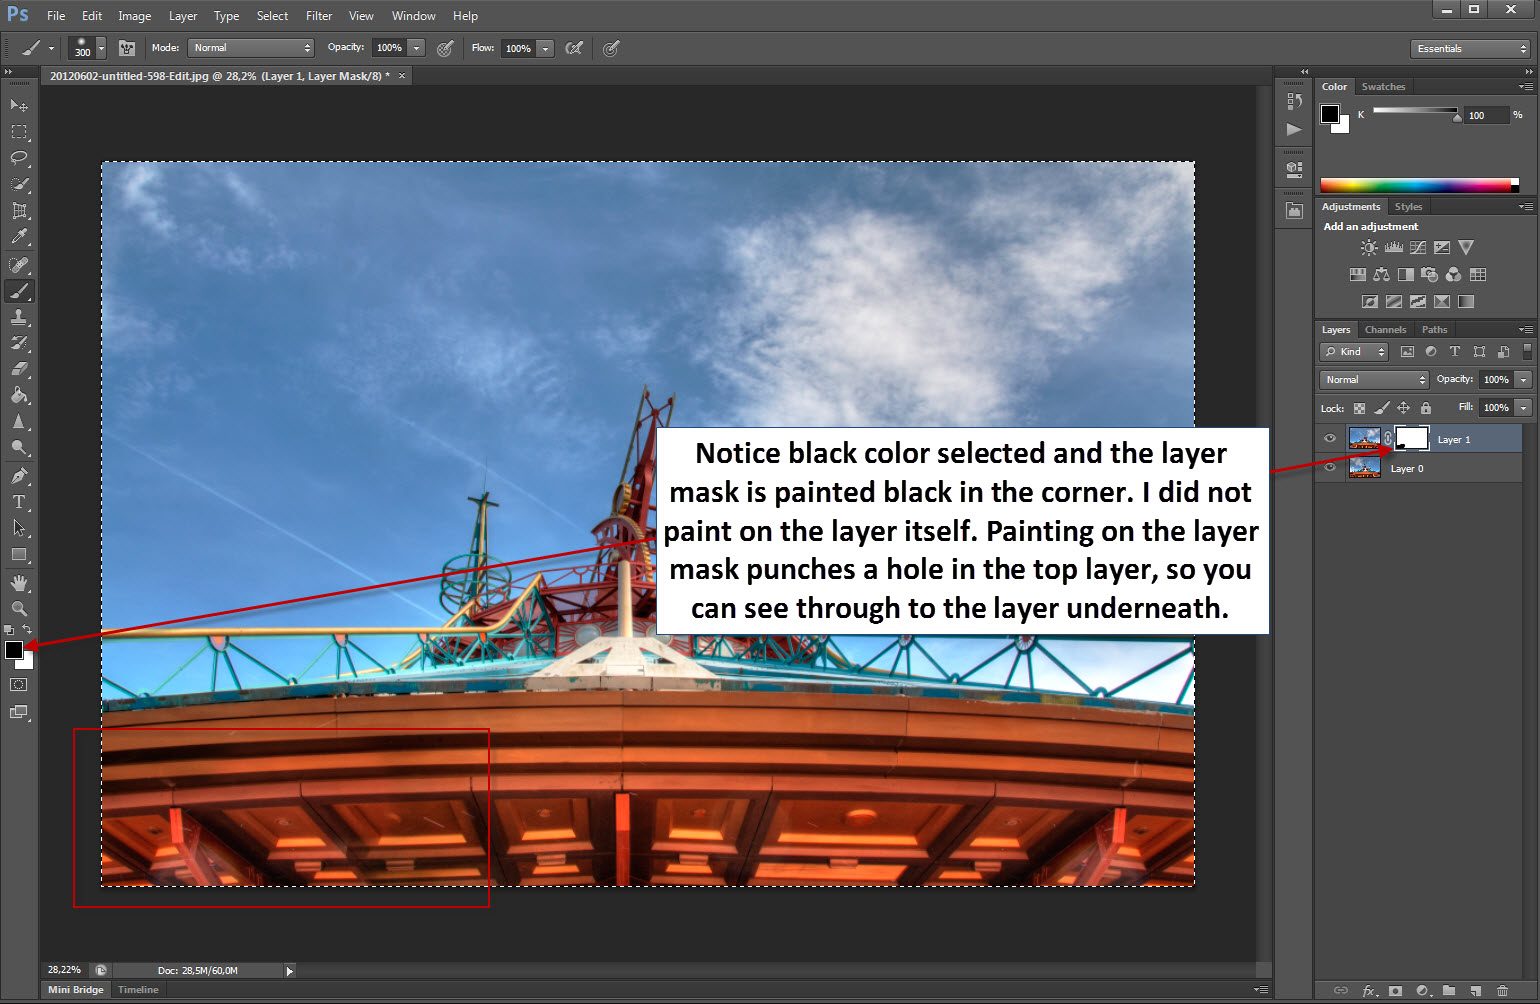
And then I used a Layer Mask to paint through. What a Layer mask does, is punch a hole through the layer it is attached to, but only where you paint black on the layer mask. This is the procedure to add a layer mask and paint through to the layer underneath:

And notice how the layer mask is painted black in one corner, making the layer below visible: