Copenhagen waking up

Copenhagen waking up

Waking up in Copenhagen.

On my way to the dentist one early morning, I suddenly noticed this reflection. I have crossed Kultorvet in Copenhagen hundreds of times. But I have never seen the reflection. I had 15 minutes for shooting photos. I learned the reason why I had never seen the reflection before. just as I was finishing up. It is a fountain, and I had to jump off not to get wet.

Nyhavn Just Before Sunrise

On this particular morning, I saw the craziest wild colored sunrise, but I never saw the Sun itself. I saw it shine on the city behind me, but before it got clear of the horizon, it disappeared behind clouds. Really weird. This photo is from Nyhavn in Copenhagen. While Nyhavn means New Harbor, it is an old harbor today. Photo by: Jacob Surland, www.caughtinpixels.com. Licensed Creative Commons, Non-Commercial, no derivatives v4.0.

Nyhavn (New Harbor) is a beautiful place in Copenhagen.

On this particular morning, I saw the craziest wild colored sunrise, but I never saw the Sun itself. I saw it shine on the city behind me, but before it got clear of the horizon, it disappeared behind clouds. Really weird. This photo is from Nyhavn in Copenhagen. While Nyhavn means New Harbor, it is an old harbor today, only there used to be an even older harbor.

Today Nyhavn is the place to go, for a cold nice beer and a nice meal on a summers day. Not only tourists go there. If the weather is great, the locals will go there too, for a beer after work, or just to hang out.

Aller Huset in Copenhagen

A fisheye lens lets you do some pretty wild things, like this close-up, of a tall building. Even standing very as close as I was, I was able to include all of the building. I shot this photo of the Aller House in Copenhagen, using my Sony A7R and my sweet old Nikon 16mm fisheye lens. The Aller Building is one of the more spectacular new buildings in the Harbor of Copenhagen. It's located right next to the shopping mall Fisketorvet. Read the full blog post: http://goo.gl/H8dVyw--Jacob SurlandArt sale as limited prints only. Photo by Jacob Surland, www.caughtinpixels.com Licensed Creative Commons non-commercial v4.0. No Derivative Work. Protected by Pixsy.com.

Aller House in Copenhagen shot with a fisheye lens.

Bo Nielsen (from www.justwalkedby.com) and I went shooting in the area around Fisketorvet. We were rewarded with quite a lot of great clouds and a rainbow, and a short but intense shower. Some people says rainy weather is not for photography, but I do not agree. Of course, you have to be careful with your equipment. Some equipment is more water resistant than other, but using a piece of cloth and a plastic bag you can do quite a bit in rainy weather if it’s not too intense.

A fisheye lens lets you do some pretty wild things, like this close-up, of a tall building. Even standing very as close as I was, I was able to include all of the building. I shot this photo of the Aller House in Copenhagen, using my Sony A7R and my sweet old Nikon 16mm fisheye lens. The Aller Building is one of the more spectacular new buildings in the Harbor of Copenhagen. It’s located right next to the shopping mall Fisketorvet.


Steampunk Balloon Wagon seen from a low vantage point

Steampunk is a cool fantasy world. What if the world hadn't evolved into the modern Information Technology world, it is today, would it have evolved into Steampunk? You can find this particular Steampunk balloon car in Tivoli Gardens in Copenhagen, a fairytale amusement park. The second oldest in the World. Photo by: Jacob Surland, www.caughtinpixels.com Licensed creative commons non-commercial v4.0. No derivative Work. Protected by Pixsy.com.

The fairytale amusement park Tivoli Gardens, in the center of Copenhagen, holds many small wonders, like this fantastic steampunk car.

I always carry a camera around with me and a small tripod in a very small bag. On a daily basis my normal or even my travel tripods are too big to carry around, and I just have a small Manfrotto tripod. If used carefully, it can be used  even by my Nikon D800 and the huge 14-24 mm lens.

I must admit, that from time to time, I get shots, I wouldn’t have thought of, but are provoked by my small tripod, and these couple of photos from Tivoli Gardens are fine examples of this.

This small alley is my favority part of Tivoli Gardens, not only because the 'Kissing Bench' used to be there. Actually, I don't know if it's still there, maybe it is. Photo by: Jacob Surland, www.caughtinpixels.com Licensed creative commons non-commercial v4.0. No derivative Work. Protected by Pixsy.com.

A small alley with a beer garden, small shops and great candy. Is there anything better?

Notice how small lines suddenly play a huge part in leading the view up through the alley. Had the camera been higher, the lines would have been less obvious. Using these lines can be really powerful, and this is a stronger example of using very small lines.

Going really close to objects, can change the perspective, and make things seem different tham they are. An optical joke. Photo by: Jacob Surland, www.caughtinpixels.com

I arrived too early at work, the day after they had changed the alarm, and I couldn’t get in. Instead I took out my camera and the small tripod, and started shooting. It is the Tivoli Hotel right in the middle. The hotel is placed close to Tivoli Gardens, but not in the garden itself.

I did cheat a little bit on the hotel in the middle. It wasn’t symmetric to begin with, and it seemed wrong. And by a simple mirroring trick I made it symmetric, and it was a dramatic change. Now every line in the image points to Tivoli Hotel.

How to remove grafitty from a wall

The Old Observatory at Brorfelde in Denmark sitting in the sunset on an early spring evening. Looks like it's going to be a night, worth watching the stars. Photo by: Jacob Surland, www.caughtinpixels.com

I shot this the other day, while waiting for my son while he is at music training. I have 40 minutes, and this time of year, it fits with the Sunset.

Brorfelde is an old observatory, that I have wanted to see for a while. When I got there, all of the trees had just been cut down, and the ground was all tractor wheels and ruble. Not exactly a great ground for photography. But I tried to clone out the worst of the tracks, and then I darkened the ground quite a bit.

My goal with this one, was to make a fairly classic sunset photo, with the two observatory buildings leading to the sun. I captured a couple of people riding the horizon. These I left in the image, though they would be easy to clone out, because they add value to the image.

Interesting trick used

The wall on the nearest observatory building is full of grafitty. To get rid of it, I duplicated the layer, blurred the top one, just enough to make the writings disappear. Then I took a texture of a wall, used overlay blend mode and painted that gently on top of the wall, and then the wall still has it’s color from rust and the light, but also new texture.

This is the grafitty – to particularly pretty. Notice the rust on the wall.

Brorfelde grafitty

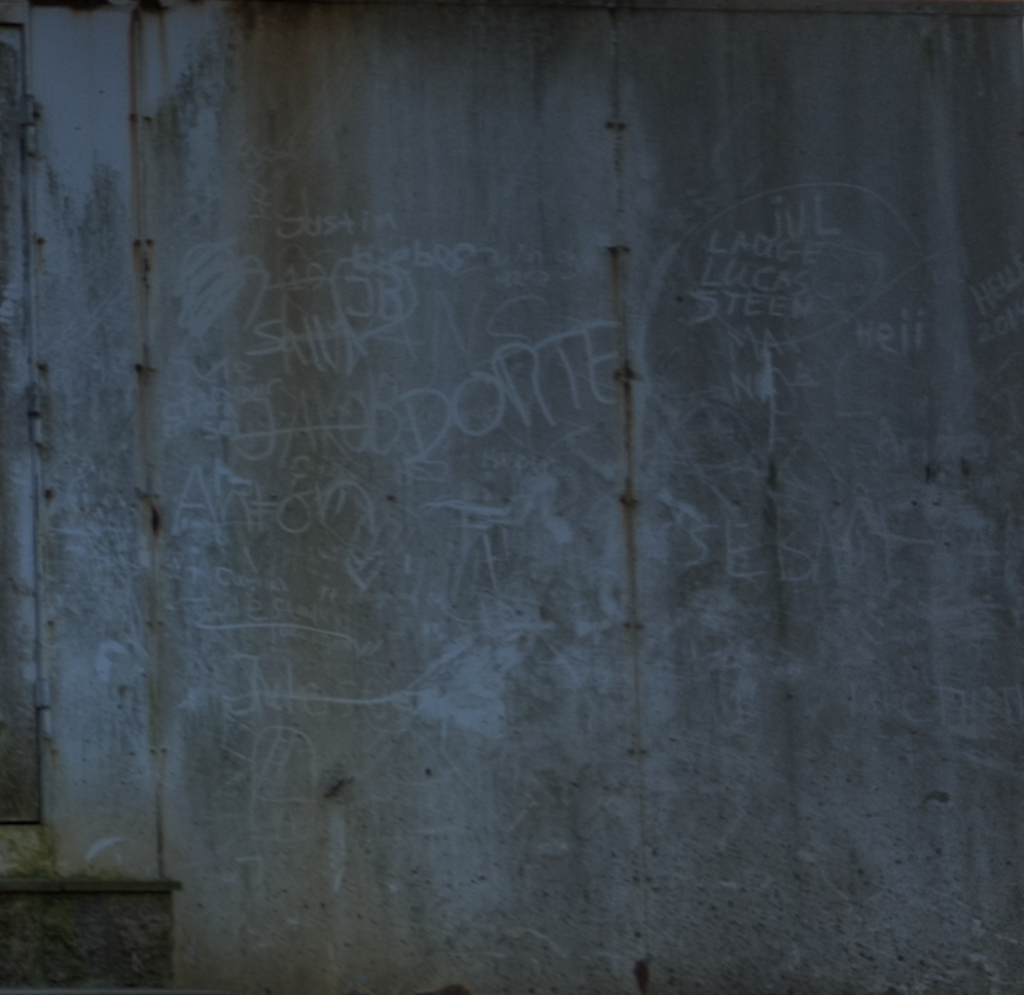
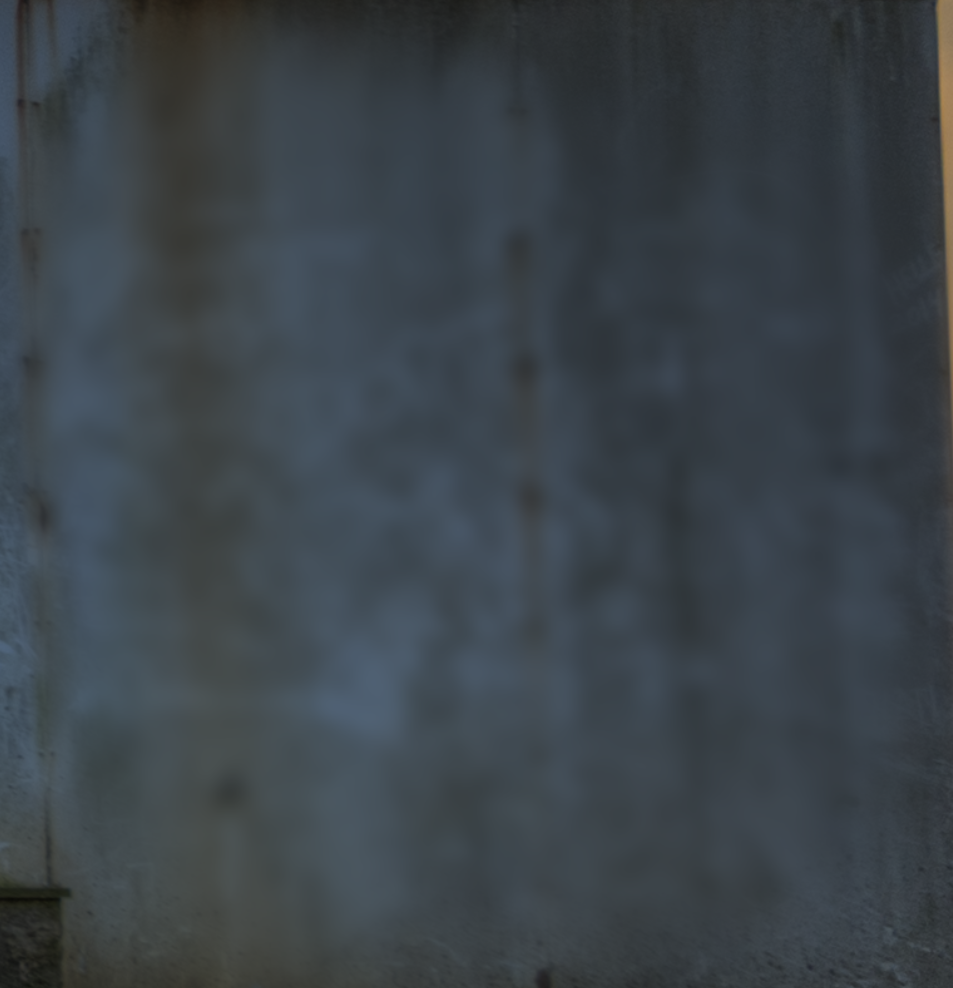
First thing I did was to duplicate the layer, and then blur using Gaussian Blur in Photoshop. I blurred just enough to make the grafitty unreadable. I then added a black layer mask to the blurred layer and painted the blurred layer on in, wherever the grafitty was.


Brorfelde grafitty gone

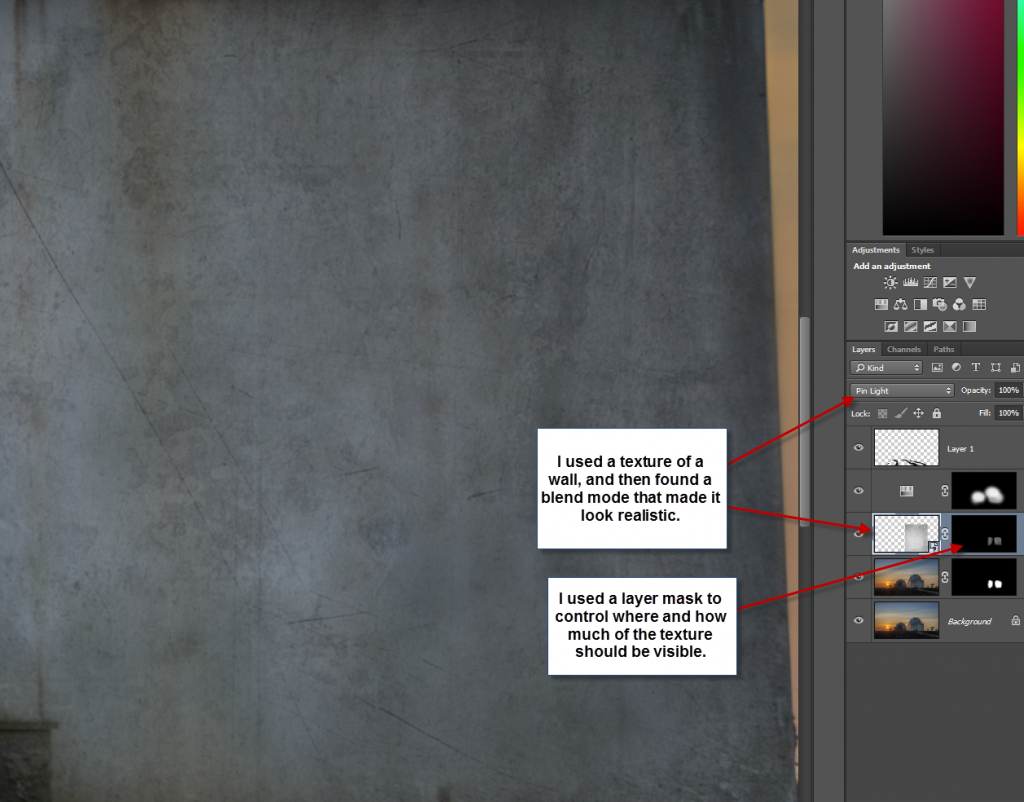
I then found a texture of a wall and by using the feature ‘Blend mode’ in Photoshop. I can add back some texture to the wall while I still keep the colors of the original wall. Notice the rust is still there.

Brorfelde grafitty new texture


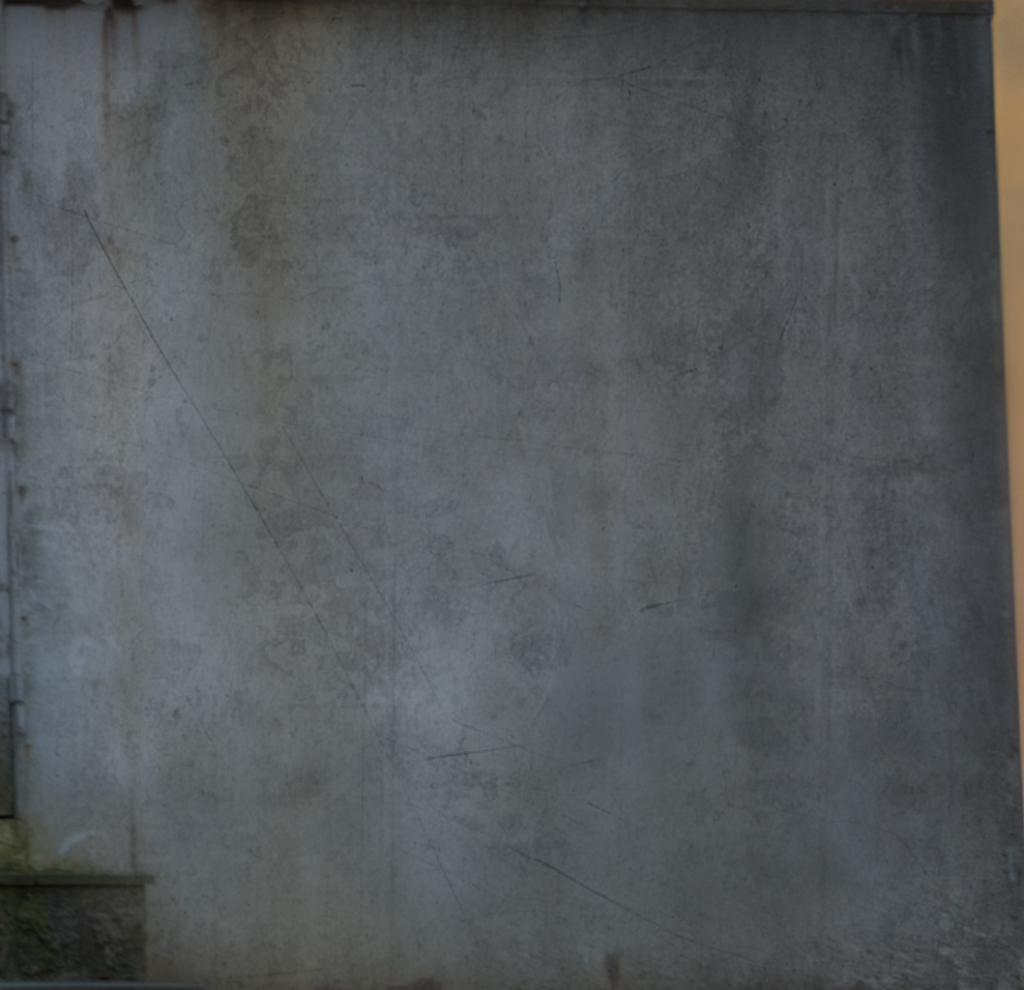
I did it by changing the blend mode on the layer with the texture. I added a layer mask to that layer too and painted in the texture where ever I had painted in the blurred layer. The blurred wall, now receives texture but keeping its colors. There are a number of different Blend modes, i just tried all of them, and picked the one, I found best for the purpose. In this case, it was Pin Light.

Brorfelde grafitty new texture how

The Tip of the Peninsula

The tip of the peninsula

This one I’m quite anxious about. I have really worked this photo hard and don’t know if I went over the edge and over processed it. The sky was dramatic and had wonderful colors, but I have really extracted them quite brutally, but I do like the result. I think it’s nice.

About processing

It’s an 5 exposure HDR. Just by processing it as an HDR I really get a lot of nice texture both from the rocks and the sky. That’s one thing that HDR and tone mapping is good for. I then used OnOne photo filters to emphasize the sky even more. This I could have done in Photoshop as well, but it’s just easier to use a filter, which is a kind of a template.

The water I have left as the HDR version, which gives this ghosted water, which I sometimes like and other times don’t like. In this case I like it. However, in the lower right hand side corner I merged in the water from the brightest exposure. The brightest exposure has got the longest exposure time and has this wonderful smokey water as you can see.

Before and after

So far so good – but I had a problem. The composition of the original photo had failed, but I did like the sky so much, so what to do? Let’s look at the original:

The tip of the peninsula - before

As you can see quite different from the final photo and much more flat and boring. But look at the stones. The sky is more or less the same, but the stones I have changed … a lot!

#1 The sky is really flat and is nowhere near what it looked like for real. What I have created is not what it looked like, either, but that wasn’t my purpose. Sometimes I make a portrait of reality, and at other times it’s more like a painting I make. This is a painting.

#2 I clean up the photo. There are dust on my sensor – these must be removed. The ship in the horizon; gone too. And the other thing in the water I also removed. I prefer to use Photoshop’s spot removal or the content aware fill to clean up in my photos. The spot removal is good for small spots, and thin lines. Content aware fill is used to remove a larger areas, but I did not use content aware fill in this particular photo. I only used the the spot removal tool.

#3 The stones I stretched a lot. What I did was that I selected the square going from the horizon and down to the bottom. It is easy in this case, because the horizon is straight, otherwise I wouldn’t have been able to do it. I then used used the Edit->Tranform->Scale feature of Photoshop, and extended the lower part of the photo, until the large boulder in the left hand side of the photo was completely out of the picture. And that helped on the composition. Of cause it would have been much easier to get it right ‘in the camera’ when I shot it, but I failed to do that in this case, and I didn’t want to let go of the sky.

No Moeraki Boulders in Kings Garden

No Moeraki Boulders in Kings Garden

There are no Moeraki boulders in Kings Garden in Copenhagen. They are round stones however only half the size of a real Moeraki boulder. Everyday for the last 7 years I have walked through Kings Garden to get to work. Until a year ago the stones were just round stones to me, but then I started to prepare a long vacation in New Zealand. Along with that, came the knowledge of the Moeraki Boulders. Ever since I have been to the Moeraki beach, these round stones, though only half size, reminds me with great joy of New Zealand. Oh what a wonderful place – I want to go there once more!

About the photo

This is a 5 shot HDR from -2 to +2. The sun I have placed in the leaves, to take some of the strength out of it and then I used a 5 inch tall tripod to get close to the ground. That makes the boulder look quite large and gives the viewer a feeling of 3D in the photo.

About the processing

I processed this in Photomatix and then blended the layers in Photoshop to get rid of nasty halos in the sky (see my too tutorial on blending layers). I wasn’t quite satisfied with the result and have had the photo lying around for some months, without a fixed solution. But then the other day I picked it up again. I added a shadow to the stone, adjusted the light about in the leaves, in particular in the right hand corner. For some reason they kept coming out too black. What I have found out in the mean time, is to use the Dodge and Burn tools in Photoshop. The Dodge tools makes things brighter, where ever you paint, and the Burn tool makes things darker. In this case I used the Dodge tool to brighten the leaves. What’s cool is that, I specify to make the shadows brighter, and then it will leave the bright sky untouched, and that really worked, and I got green leaves instead of black.

Late Summer Sunset

Late Summer Sunset

The late summer in Denmark is beautiful. This is after a great barbeque at my Brother in Law. They just bought a farm on a small island.

It’s a 3 shot handheld HDR. Instead of using shutter speed to bracket my three shots, I used the ISO. The brightest one was ISO 6400, which made it a bit hard to work with, due to the noise. I wouldn’t recommend doing ISO bracketing, when the ISO goes that high. I had to do it, because it was hand held and it was too dark to shoot the photo otherwise.

Tip: Crop dead areas away

Misty Orange Sunrise

Sunrises and sunsets keeps amazing me. You still can be surprised and see new wonderful variations. This photo is hardly processed. In Lightroom I have increased the contrast a bit, lowered the clarity a little and then raised the vibrance slightly. Not a lot compared to what I do to some of my other photos.

Tip: Crop dead areas away photo
In the beginning I didn’t want to cut away pixels. The more pixels, the better. I’m still struggling with this, but I have learned that some photos really get a much stronger composition by cropping them.

This particular photo doesn’t have much of an interesting foregrund and the sky continues upwards as orange. It becomes dead areas with nothing interesting. By cutting that away, I cut away dead zones and is left with the good stuff and that makes a stronger composition.

The Frozen Setting Sun

The Frozen Setting Sun

The sun right into the camera? 9 exposures with 1 EV step between each. I was just on a small business trip to New York. I managed to get time to go to B&H and get myself a Promote control. For some reason I can’t buy that in Denmark. The Promote control should be a tool in every HDR photographers backpack.

The Promote control allows (through a cabel) to take as many HDR photos you like. I can then take 9 HDR photos automatically with my Nikon D600 (which is normally limited to 3 shots), just as I can with my Nikon D800. But I can also increase the EV step between each shot. The D800 is locked to 1 EV step, which means that if I really wan’t to cover some dynamic range, with the Sun within the frame and dark shadows too, I have to switch to manual. Another nasty side effect of taken 9 bracketed shots with the D800 is the 675 Mb impact on the memory card (ouch!).

With the Promote control I can take what ever number of photos I like with whatever EV step. Now that is cool, and I can’t wait to get it in use for real.

For this shot I didn’t have the Promote Control yet and took all 9 shots of 75 Mb each.

About the processing
I used Photomatix to tone map the image. Afterwards I have spend quite some time in Photoshop blending layers. The sky kept coming out dull and gray from Photomatix, so I had to mix in another sky from one of the original photos, but it was still too flat. So I made a duplicate layer and started playing around with the Red, Green and Blue channels individually in the Hue/Saturation dialog (CTRL + U) untill I got what I wanted. However, that ruined the lower part of the image completely, but that was not problem, I just mixed in the sky with the rest of the image.

Finally I spend quite a lot of time cleaning up small peckles on the ice and the bridge.