Happy New Year!


Warning: Undefined array key "multiauthor" in /var/www/caughtinpixels.com/public_html/wp-content/plugins/post-layout/plugin.php on line 114

Warning: Undefined array key "mobile" in /var/www/caughtinpixels.com/public_html/wp-content/plugins/post-layout/plugin.php on line 352

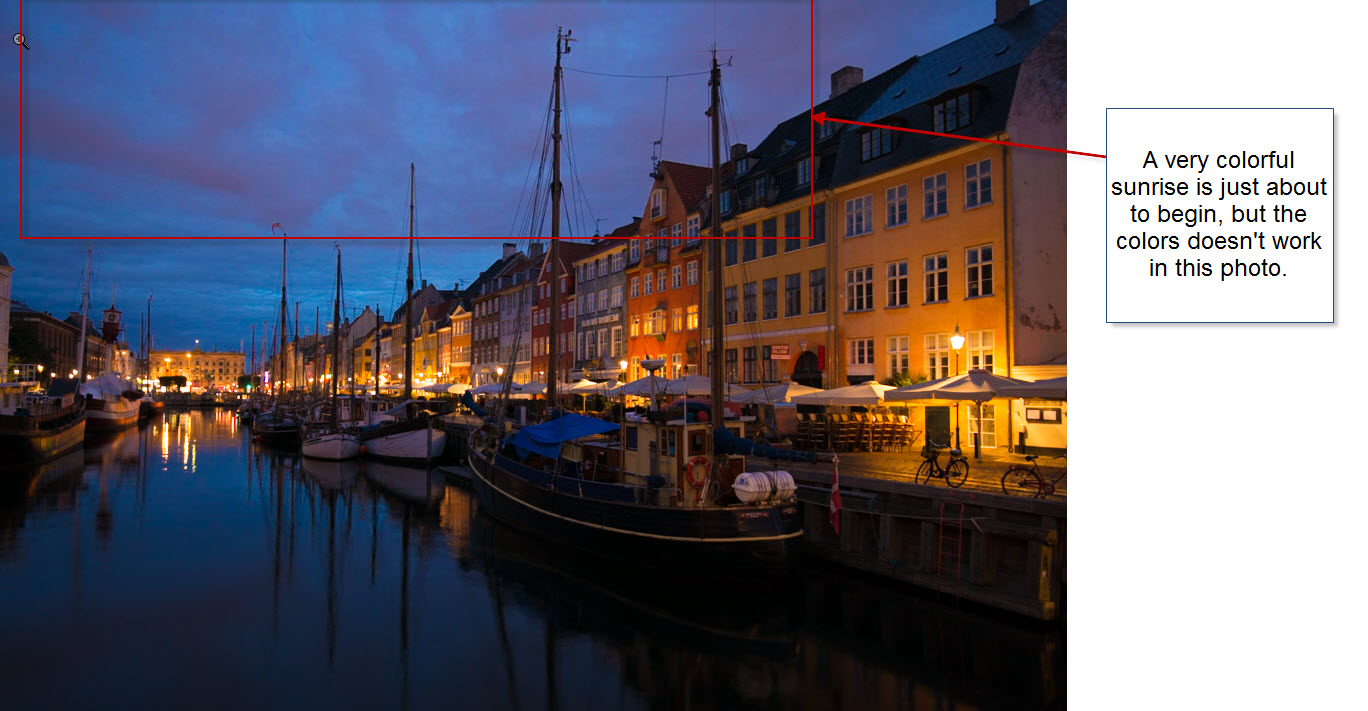
In the heart of Copenhagen lies the ill named New Port. A long time ago it was the new port, but as years has passed by, New Port has turned into a very port full. This is the place to go for cold beer on hot summer day or grab a traditional danish meal. A great place that must be seen. Photo by: Jacob Surland, www.caughtinpixels.com

This will be my last post of 2013 and I wish everybody a Happy New Year. It’s been quite a year. I started out from absolutely nothing, with this blog. I didn’t have an exact purpose yet, but as people started asking questions, the purpose became more clear. I have focused on delivering high quality photos and sharing ‘the making of…’, that is explaining what I did in particular with each photo. And this has turned into quite a success – I now have thousands of readers every month – much more than I expected, when I started out.

I also did a rather popular review of the D800, D600/D610 and Canon 5D Mark III, based on my real life experiences (you can read here if you missed it). For unplanned reasons I ended up having three high end cameras at the same time, and had them for more than 6 months, allowing me to review them from a different perspective, compared to the traditional reviewers around the world.

About this photo

This is Nyhavn (New Port) in Copenhagen, Denmark. It’s a 7 shot HDR, which I processed in Photomatix Pro and Photoshop. I took this just before sunrise. The clouds already had begun turning purple and it looked quite crazy in this photo. In particular when I had run it through the Photomatix Pro.

This is the original 0 exposure:

Denmark - Nyhavn before

I ended up, taking the much of the colors out of the sky, to get a better color balance photo. Colors are very important to photos and getting a good color balance, is important. If something is to extreme, try to dial it down. If you can…

At the other end of this canal, I took this photo only 10 minutes earlier. This one certainly has got crazy colors. The rain reflects the light and the sunrise is about to begin in the far end and things went very colorful later. I gave up fixing the colors in this one, but as an quite extreme one, I do like it:

One of the major sites in lies in the heart of Copenhagen. It's called Nyhavn and means New Harbor. This is just before sunrise, before the neon lights are shut off. Photo by: Jacob Surland, www.caughtinpixels.com

Chicago Theater on Sct Patricks Day – And the white balance


Warning: Undefined array key "multiauthor" in /var/www/caughtinpixels.com/public_html/wp-content/plugins/post-layout/plugin.php on line 114

Warning: Undefined array key "mobile" in /var/www/caughtinpixels.com/public_html/wp-content/plugins/post-layout/plugin.php on line 352

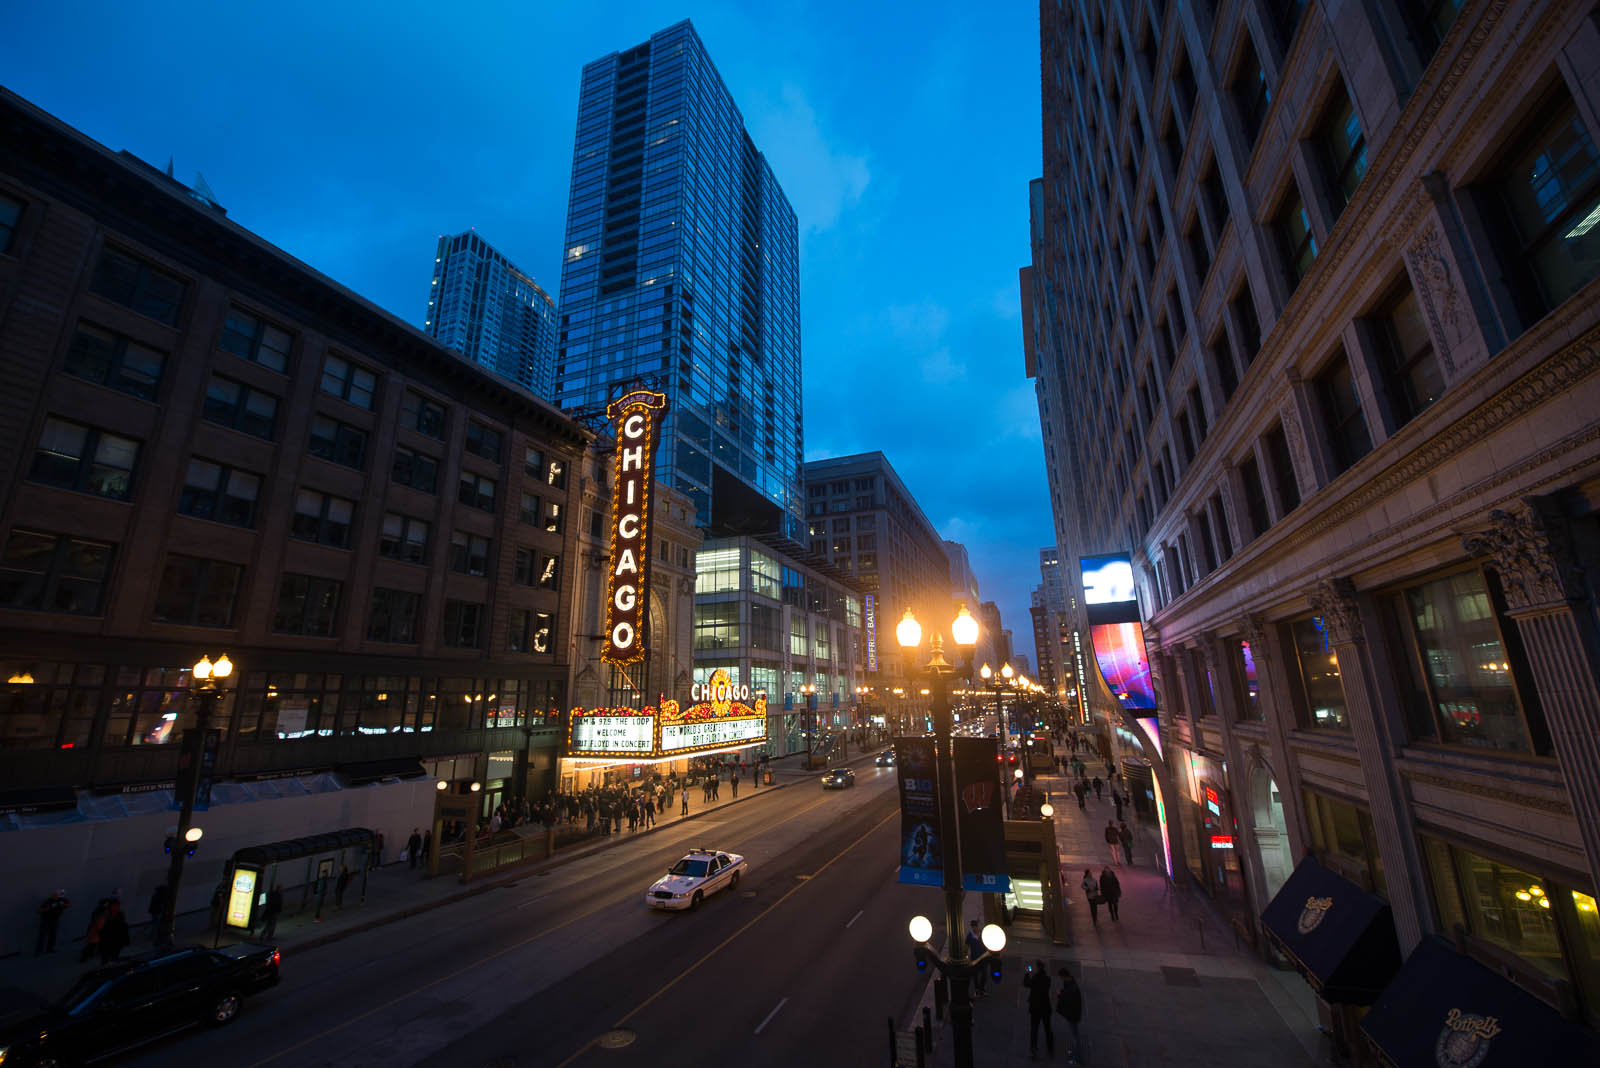
By pure random coincidence I arrived in Chicago on Sct Patricks day. I went for a walk and saw one of the landmarks ; Chicago Theater. Photo by: Jacob Surland, www.caughtinpixels.com

 Nikon D800, Nikkor 14-24, ISO 400, 14mm, f/4.5, 1/25 sec

By pure random coincidence I arrived in Chicago on Sct Patricks day. I went for a walk and saw one of the landmarks: Chicago Theater. I would have loved to go inside, but on a short business trip, you’re not always allowed that luxury.

This photo is processed in Lightroom. The main things I have done to this photo is correct perspective and then change the White balance, and then do a little dodge and burn.

Some photos work absolutely best when the colors are as close to natural as possible, while others are quite different. In particular shots around sunrise and sunset really can change mood quite a lot, if you change the white balance.

Have a look at the before photo:

2013-03-17-Chicago-037As you can see a much colder and less interesting photo. Reality is probably somewhere in between my final photo and this one. The camera is trying to deal with both natural light in the sky and electric light and chooses something in the middle, not really working.

I changed the color temperature from 3200 to 5800 in Lightroom. That added the nice and warm colors. Chicago in March, however, is a cold experience and I learned that Chicago is not named the Windy City for nothing. It was freezing cold and my colleague had to buy a winter coat! The warmth of the photo does not reflect the actual temperature, but then again, I’m not in business of portraying reality exactly, but rather in the business of making photos that I like.

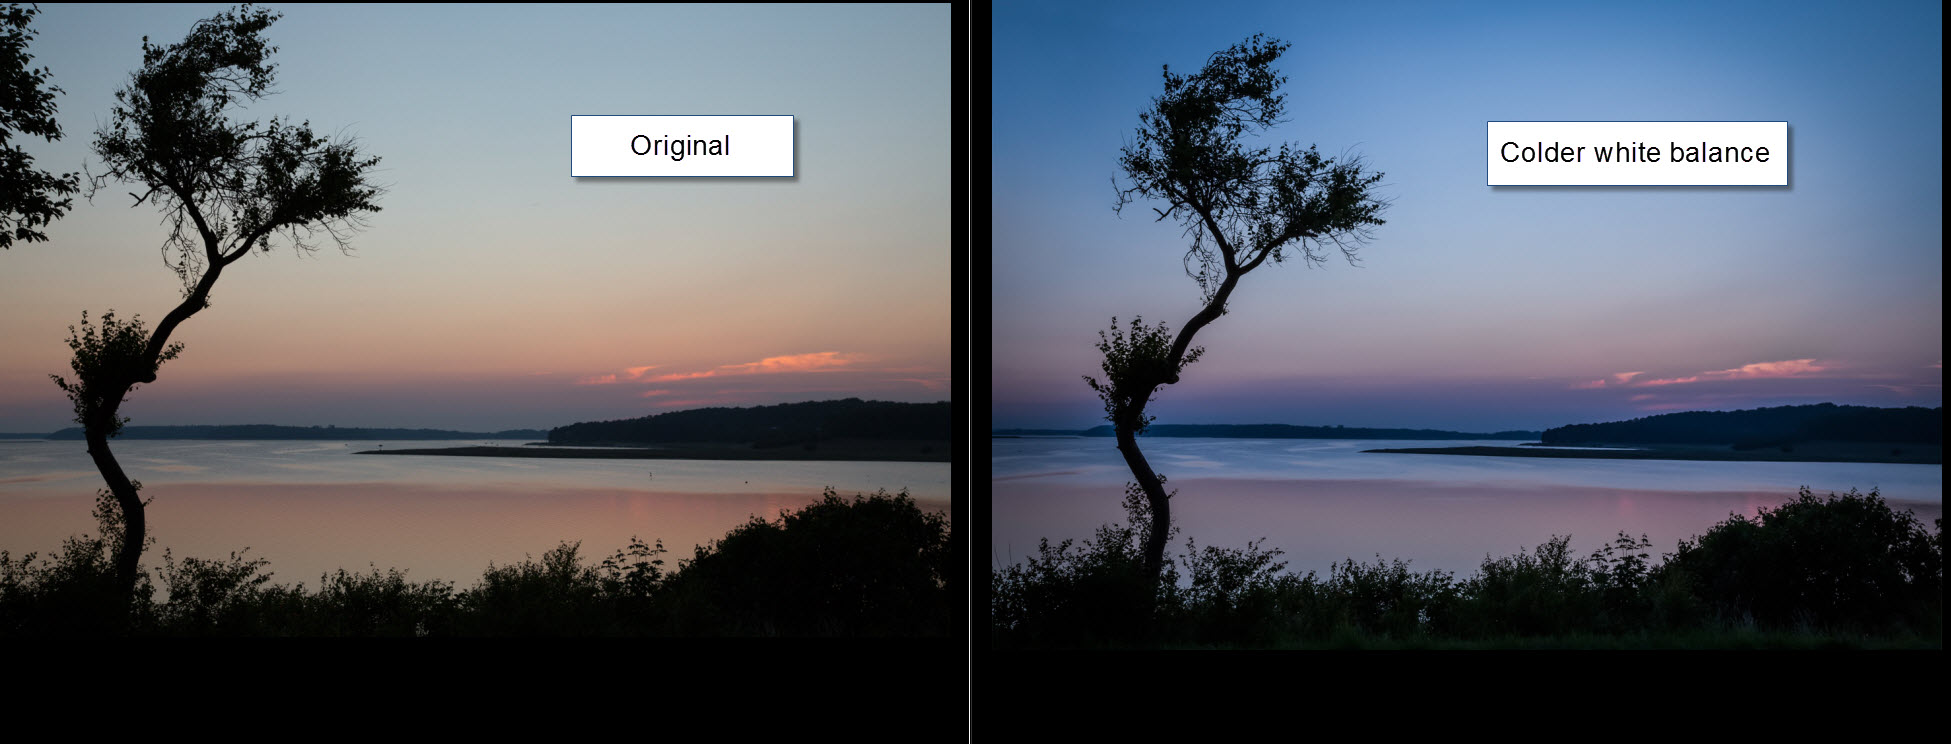
When you have these golden hour or blue hour photos, always try to make the photo a little warmer and see if you get something nice.  This is another example from just after sunset, in this case I made it colder and that also changed the photo dramatically.

White balance games

Stars above the London Tower Bridge


Warning: Undefined array key "multiauthor" in /var/www/caughtinpixels.com/public_html/wp-content/plugins/post-layout/plugin.php on line 114

Warning: Undefined array key "mobile" in /var/www/caughtinpixels.com/public_html/wp-content/plugins/post-layout/plugin.php on line 352

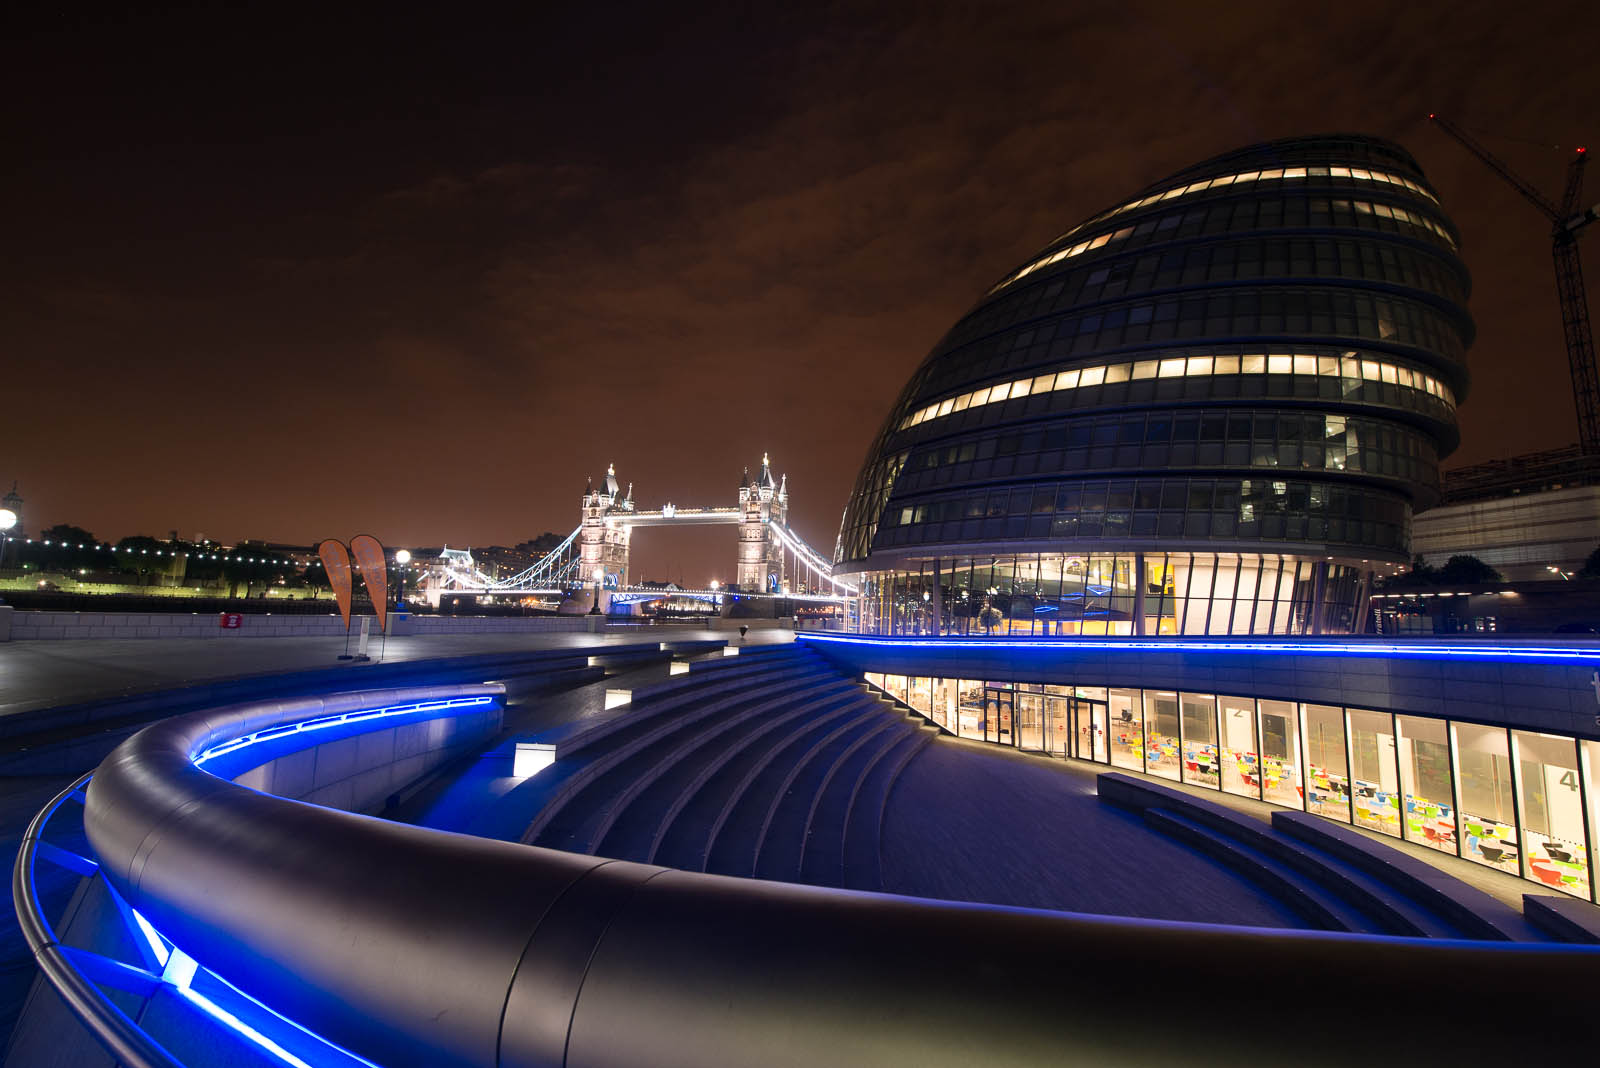
London City Hall with the London Tower Bridge just after midnight. Only a few people hovers around the area. The stars are peaking out from the skies. Photo by: Jacob Surland, www.caughtinpixels.com

I used to live in London back in 1991-92. London has changed a lot since then. Many new modern buildings have replaced old ones and I must admit, that they are doing a really good job of doing this. Magnificent architecture and daring shapes takes London into the new millennium, as the true world metro-pol city it is.

The London City Hall looks like a … space helmet or a twisted egg, and there’s this amphi theater right in front of it. And it is built just next to the old London Tower Bridge and it stands beautiful in the night. And behind my is the alley that leads to another of Londons new buildings, the Shard.

The making of this photo

The photo is a 7 shot HDR ranging from -4 to +2. I often shoot with an exposure compensation of -1 or -2 in night conditions like this, with really really bright parts (lamps) and really dark shadows. I only use -2 if I shoot 9 shots. Why do I do that? Because the lamps really are bright in the night and the camera really is struggling trying to capture all light, so my -4 shots are aimed at the light sources only.

The 7 shots I tone mapped in Photomatix Pro. I have worked a long time with this photo afterwards both in Lightroom and in Photoshop, without really finding what I wanted. This is the original untouched photo (the 0 exposure):2013-06-19-London_senior-950

While this is in many ways is a nice photo I wanted more of it, and there are things I don’t like about it. As it turned out, it proved to be quite a problem to hit the right node, and the major problem really was the sky. It was far too orange to my taste, mind you it was kind of orange when I was there, but it just didn’t really work.

I tried a lot of different things. The HDR process only made the orange sky even worse. I tried working with the white balance and the helped a bit. In the end I ended up using very cold colors on is photo, to take out the orange colors,

While working the image I realized, that the light beams on the Tower Bridge shone up in the air, while not very easy to see I decided to exaggerate them and that helped quite a bit. I did that using dodge and burn tools, by raising the exposure in an area like a beam going up from the sky.

UK - City hall and london tower bridge

To emphasize the light beams even more, I increased the contrast on the clouds. What happened then, was that the upper left corner went black.

It was dark, but the increased contrast made it black and it looked like a hole in the clouds existed, and that gave me the idea of putting stars there.

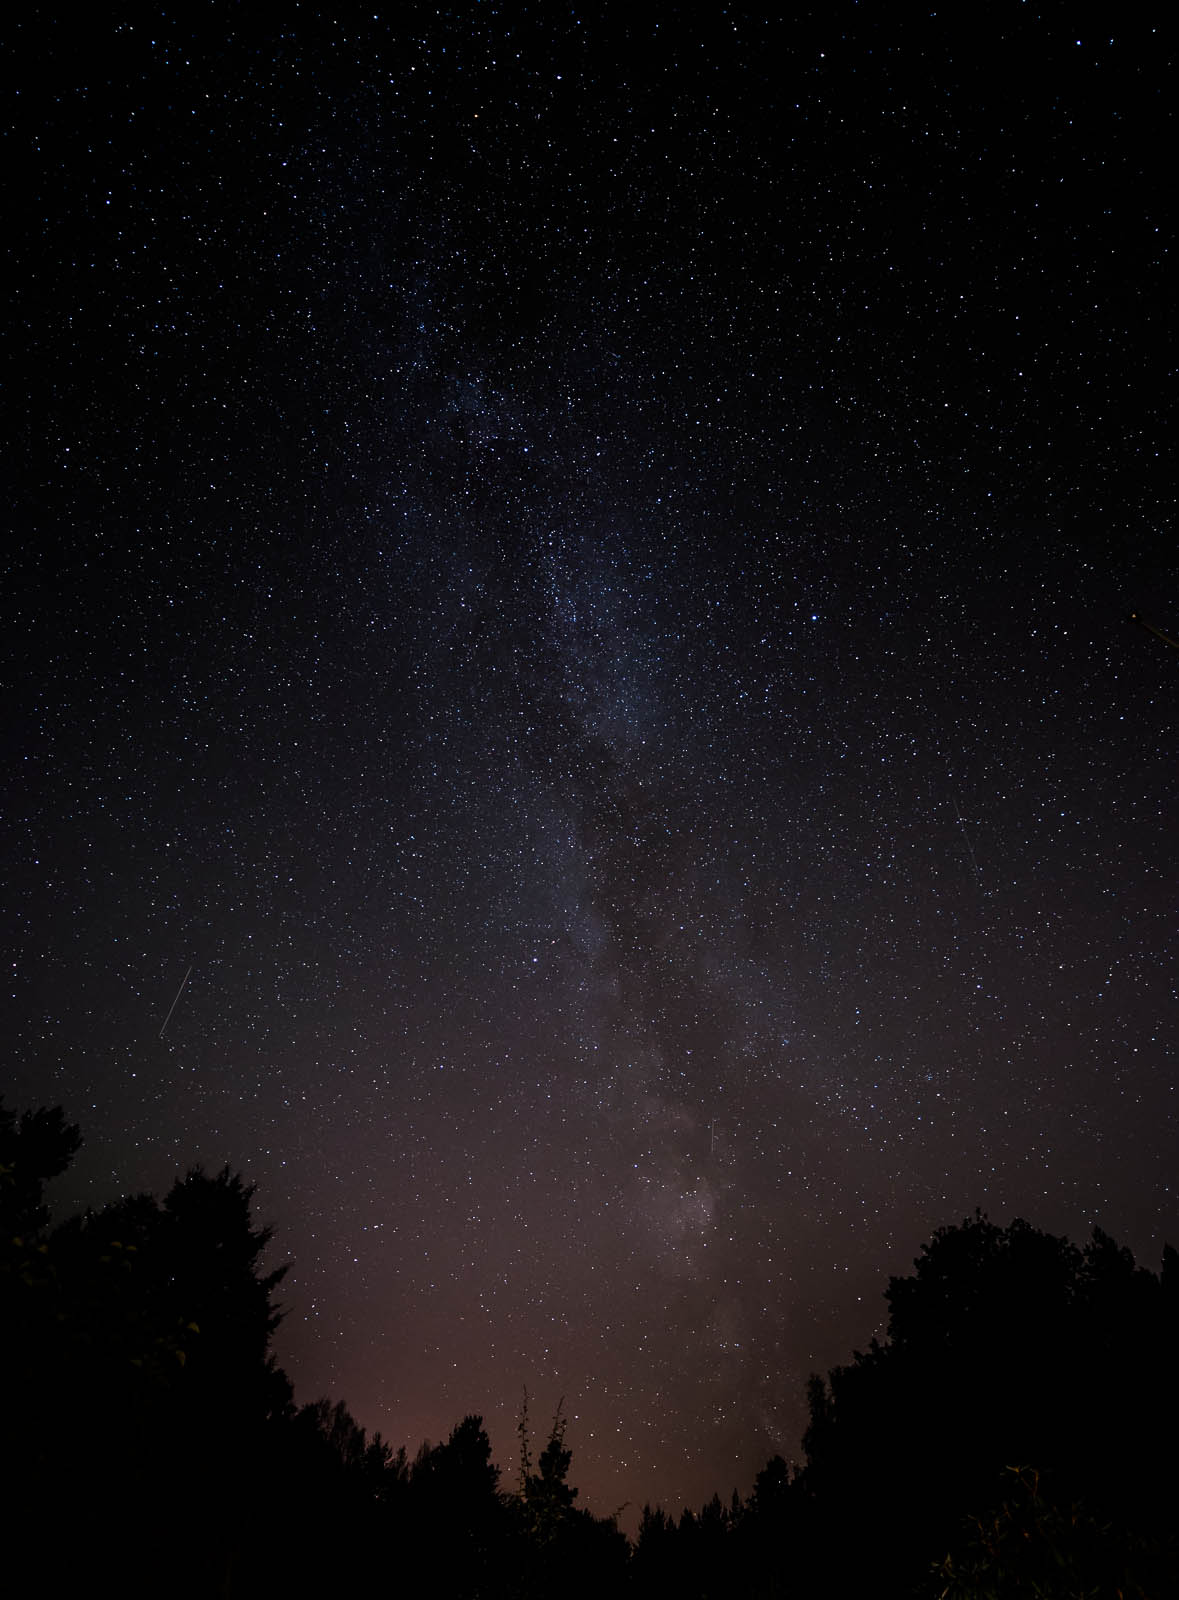
I have this great photo of the Milky way I shot in Sweden some time ago, that lacks a good scene, but the stars really are nice.

2012-10-06-Karlskrona-285

I decided to merge the stars into the left hand corner like this and I made the light beams even more visible using a curved layer. Now things started work for me!

UK - City hall and london tower bridge step 2Here you can see that I add layers with a channel mixer. I do that to work with the colors and take out the orange. Things go a bit too blue and in Lightroom I ended up de-saturating a lot of the clouds and adding some yellow to the bridge, to make it work nicely.

I also removed the orange two flags. This required some detailed work with the clone stamp tool in Photoshop. My son said – wow it’s just like “Tron” – and his Daddy was happy! Even though it is “only” London.

The Main Entrance of Tivoli at Christmas


Warning: Undefined array key "multiauthor" in /var/www/caughtinpixels.com/public_html/wp-content/plugins/post-layout/plugin.php on line 114

Warning: Undefined array key "mobile" in /var/www/caughtinpixels.com/public_html/wp-content/plugins/post-layout/plugin.php on line 352

Copenhagen Tivoli Gardens is the second oldest amusements parks in the world. At Christmas they open with Christmas Stalls where you can buy all kinds goodies for your belly and go around and get a true Christmas feeling. Absolutelly very recommendable if you ever go to Copenhagen during Christmast. This is the main entrance. Photo by: Jacob Surland, www.caughtinpixels.com

Last year just before Christmas I took a late walk in the streets of Copenhagen with my tripod and my camera. For a long time I stood in front the entrance of the worlds second oldest amusement park: Tivoli.

It’s always incredible busy in in front of Tivoli and I really wanted a shot not too crowded with people, so I had to wait. I think I stood for 20 minutes waiting for the shots with the fewest people and allowing a long peek into the old garden. And this was what I got and I’m pretty happy with it.

However, it’s not perfect. One of the good things about taking several shots as you do in HDR, is that you get several options to merge from. In this case I had 7 different exposures ranging from –3 to +3. The longest exposure is 10 seconds, which is enough to make fast moving people disappear.

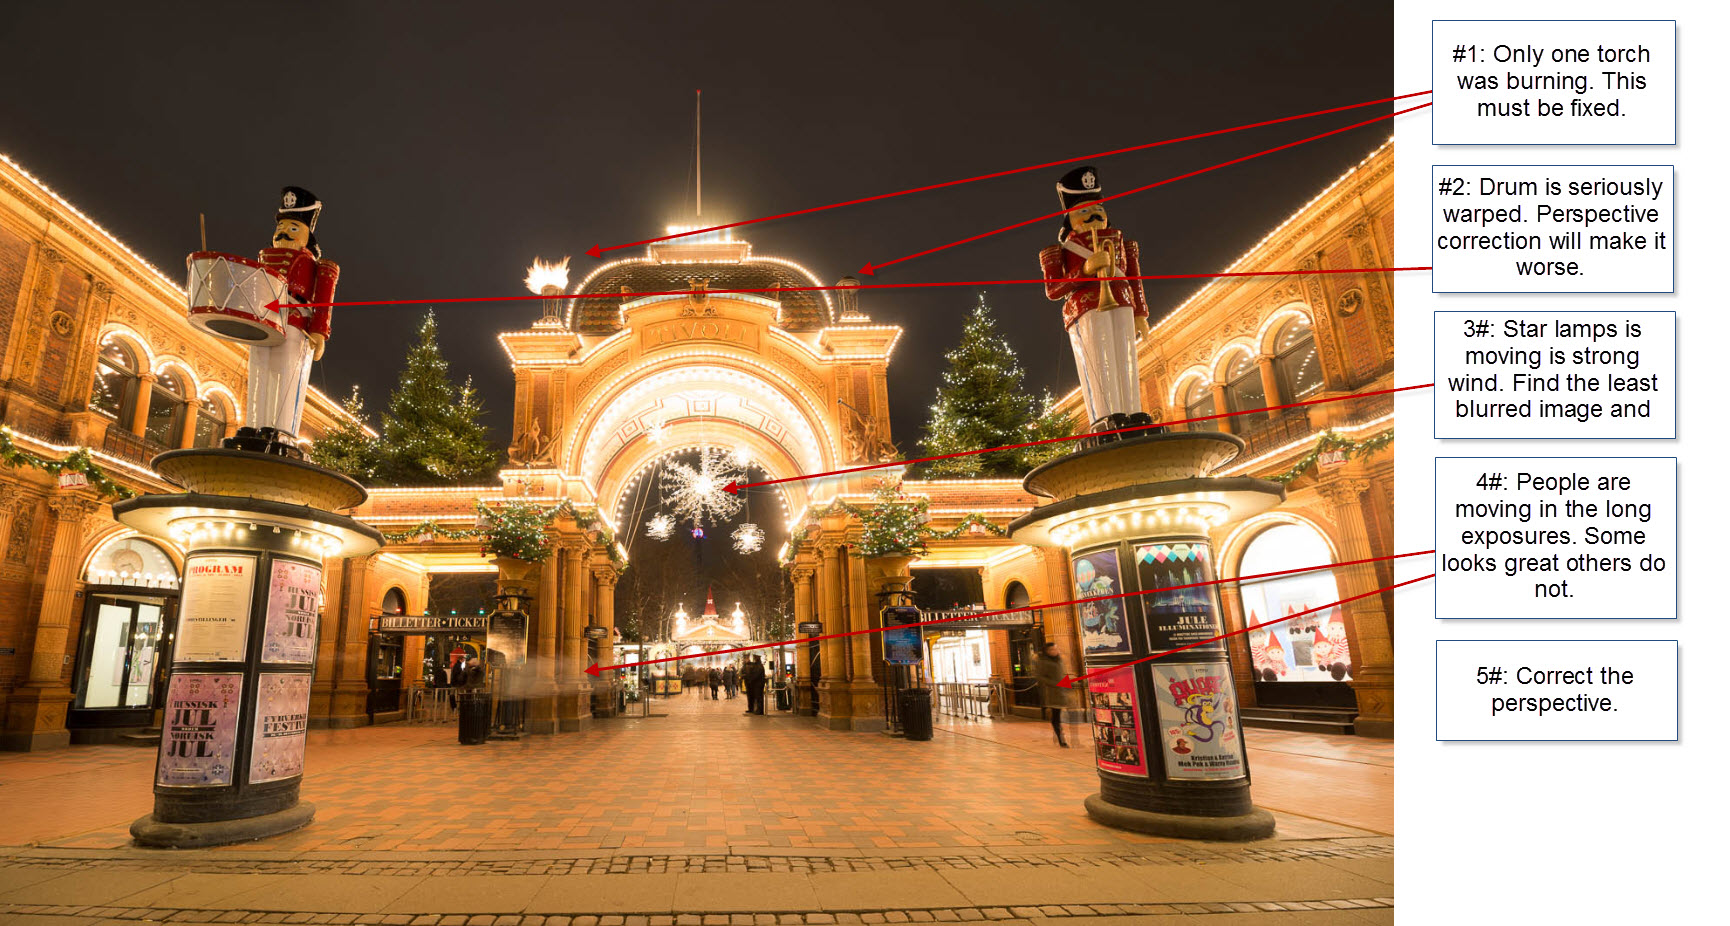
Let’s look at the untouched 0-exposureand, and see what immediate problems there is with this image:

Tivoli gates analasis

#1: They forgot to turn on one torch (or it had blown out, it was quite windy). Fortunately this photo is symmetric, and I can just mirror it to get a torch for the right hand side, and because I have 7 images, I will be able to get a torch that is not an exact mirror of the first one.

#2: The photo is taken on a 14 mm lens, which is extremely wide angled. Things in the corners of a wide angle lens does get warped, and this drum doesn’t look good. I can’t really fix it, without some kind of compromise.

#3: The stars hanging from the roof of the main gate is swinging in the strong wind. By using one of the images with a faster shutter speed, it might be good enough for a fairly sharp star. I did try to take the photos while the wind was less intense.

#4: It’s a busy area and people are moving around. Some blurry people can look quite cool, but others looks bad in the image. The goal is to get leave the cool ones and remove the ugly ones.

#5: Because this shot is shot with a wide angled lens that is tipped slightly upwards, the buildings leans. Sometimes this looks cool, but in this photo it’s not particular flattering. However, I will be in trouble when I start fixing it, because of the drum on the soldier. But more about that later.

Making the tone mapped image

First I merged the 7 shots in Photomatix Pro (by the way I just found out that there is a Photomatix Essentials. As far as I can see this gives you less artistic options, which I really can’t recommend if you want to do more artistic HDR photos).

There is a lot of dynamic light in this photo, because of all of the lights and the really dark sky and shadows. It’s difficult to capture all light, for that reason I shot from –3 to +3.

Continue reading

Roskilde Cathedral in the Mist


Warning: Undefined array key "multiauthor" in /var/www/caughtinpixels.com/public_html/wp-content/plugins/post-layout/plugin.php on line 114

Warning: Undefined array key "mobile" in /var/www/caughtinpixels.com/public_html/wp-content/plugins/post-layout/plugin.php on line 352

To create this photo I have used the clone healing brush and the perspective crop in Photoshop.  It is a 7 shot HDR photo, and I used Photomatix pro, to create both a single tone mapped image and a double tone mapped image, which I mixed with the original ones.

The original photo is not a bad one, but neither perfect.

Jack the ripper is around - before v2

#1: I removed the branches. When I straighten the church, some disappeared, but I ended up removing them completely. When I took the shot, made sure, that they were included and did not cover the church. I used the brush healing tool in Photoshop.

#2 The sky I worked with, to emphasize the light in the mist. That is an important part of the mood. I increased the contrast and saturation a bit.

#3 The church I straighten to a certain level. I can’t straighten it completely, because it makes a small fat church, which is not the reality. The compromise is somewhere in between completely straightened and this. Ideally I would have gone further away, but that was not possible.

#4 The acid color of the light from these lamp posts I didn’t like, so I worked with the colors, and mixed that into my final photo. I did that, by making a new layer in Photoshop, opened the Hue/Saturation dialog (CTRL+U) and dialed back some of the yellow and green. I then mixed the lamps into my image.

#5 These lamps are blown out, but because I shot it in HDR I can achieve the moody great look from the lamps, in stead of just a white blob. There is not a lot of dynamic light in this photo otherwise, but the lamps I save.

#6 I then used more healing brush to remove the snow. I used a clone stamp after wards to get a better result on the cobble stones.

#7 The cobble stones is the double tone mapped image. What I get from the double tone mapped image, is the lovely reflections from the lamps and the many details and textures in the cobble stones.

This is one of the photos, where you might ask “Why HDR it?” – well, I did get more details within the windows of the church and on the lamps. I also got more shots, so that I could remove people and the car coming around the corner. And then it added some of the magic, mysterious Jack the Ripper mood.

Photomatix: Tone mapping or fusioning?


Warning: Undefined array key "multiauthor" in /var/www/caughtinpixels.com/public_html/wp-content/plugins/post-layout/plugin.php on line 114

Warning: Undefined array key "mobile" in /var/www/caughtinpixels.com/public_html/wp-content/plugins/post-layout/plugin.php on line 352

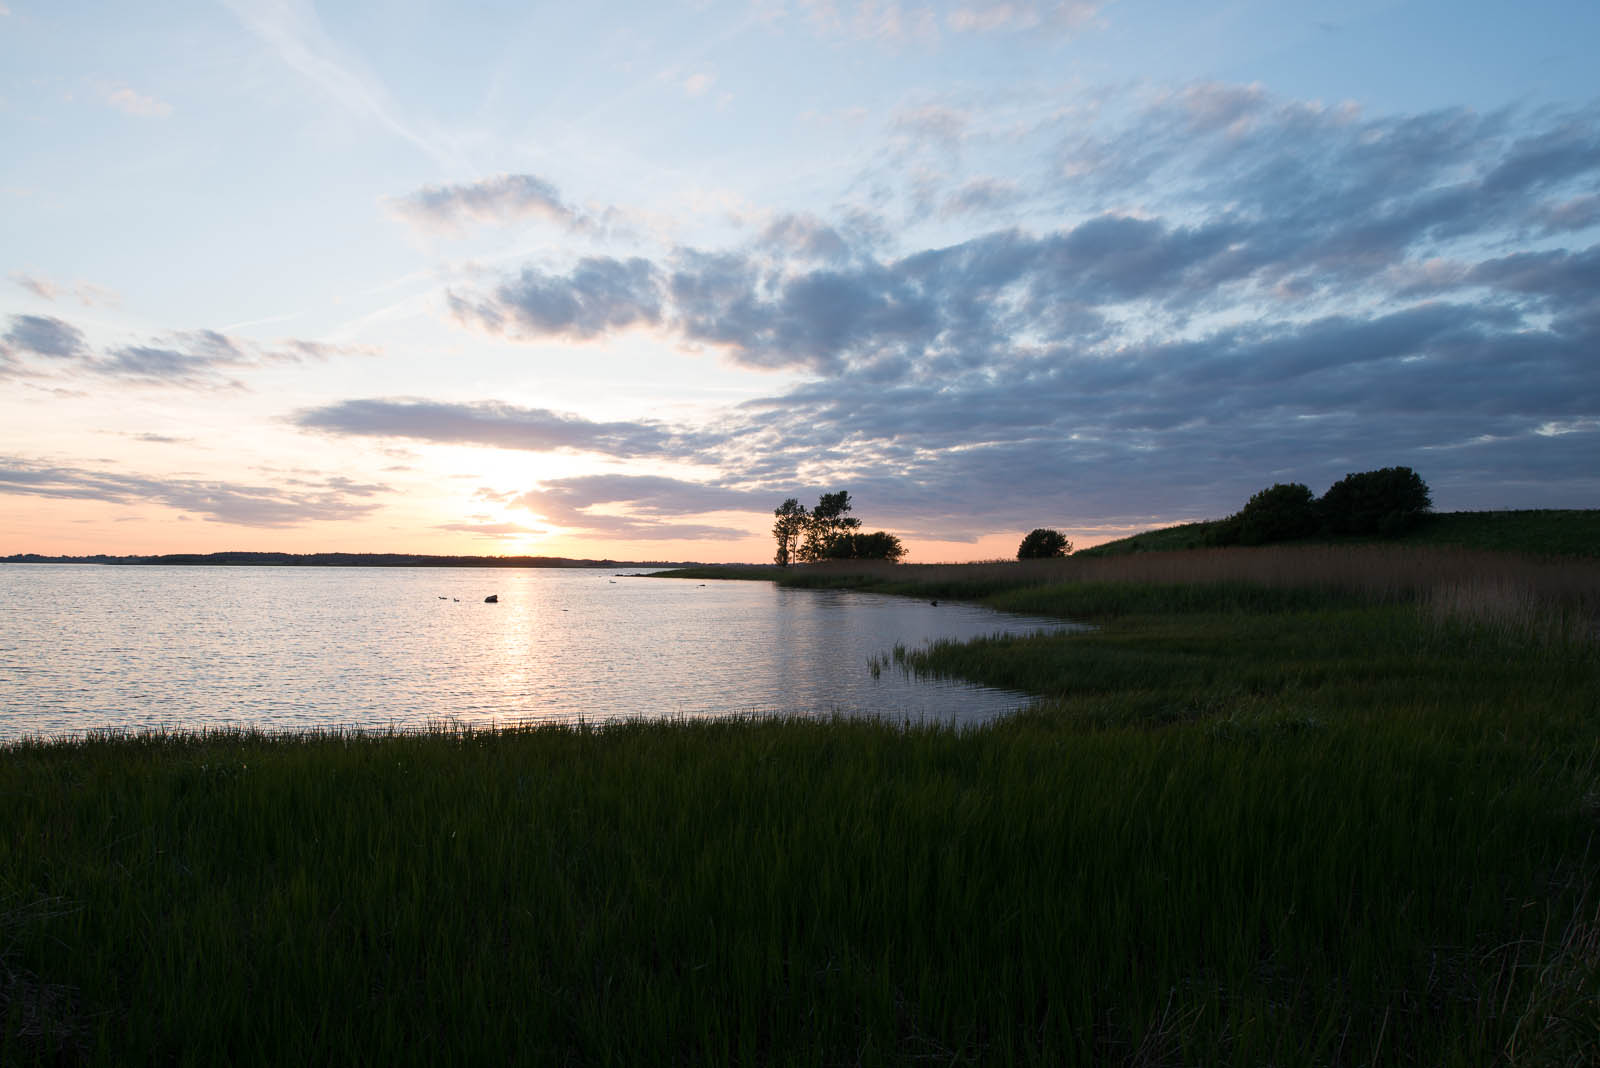
Salvad Park just north of Roskilde in Denmark and is a place for gorgeous sunsets. You can stay the night in refuges. Photo by: Jacob Surland, www.caughtinpixels.com

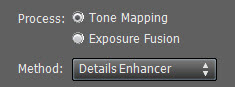
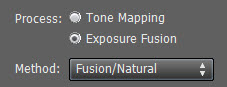
Photomatix offers many different processing algorithms, each with a different set of parameters. But cut down to what really works, more artistically there are really only two different algorithms. It is the Tone mapping -> Details enhancer and the Exposure Fusion -> Fusion/Natural.

Tone mapping - details enhancer

Exposure Fusion - Fusion Natural

Neither one is better or worse than the other, but they produce different results and in some cases one yields a much better result than the other. Tone mapping does give more artistic HDR photos, but also has the drawback of producing more noise into the photo. Noise is small grains in your image and you don’t really want it in the image, unless of course you add it artistically. You camera produces this as digital noise, and Photomatix enhances it.

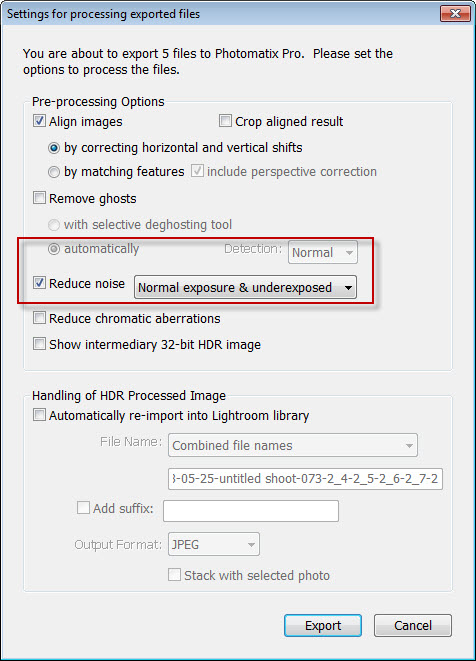
If you expect to end up using Tone Mapping, make sure to do some noise reduction. Photomatix does a decent job of reducing the noise, but often you want to apply Noise reduction on the final image too.

Remember to use Reduce Noise

“Tone mapping -> Details Enhancer” is in general more ”HDR’ish” and gives you what you normally recognize as an HDR photo.

The post-processing

This is the 0-exposure and original photo:

Original photo of Sunset at Salvad Parken

I did 7 exposures all together from -3 to +3. I did -3 because I was shooting straight into the sun. The +3 really isn’t necessary, but that is what the Nikon D800 delivers by default on 7 exposures.

I processed the 7 photos in Photomatix Pro and used the Natural / Fusion method. This gave some really nice grass in front. The sky I was not too happy with.

To get a better sky, I returned to Lightroom and started playing around with the -3 exposure. I used the -3 exposure, because it was only the sky I was looking at. The ground was completely black, but the sky well exposed.

To get some really nice colors, I started to play around with the tones. When I was happy with the sky, I exported that image. I now had 9 images.

  • 7 original shots
  • 1 HDR natural / fusion image
  • 1 Great Sky Made In Lightroom image

What I did last was to mix the sky and the HDR photo together and got the final result. I used Photoshop to blend the two images.


My first HDR tutorial class – after throughts


Warning: Undefined array key "multiauthor" in /var/www/caughtinpixels.com/public_html/wp-content/plugins/post-layout/plugin.php on line 114

Warning: Undefined array key "mobile" in /var/www/caughtinpixels.com/public_html/wp-content/plugins/post-layout/plugin.php on line 352

The Queen Victoria Building holds one of the most beautiful Shopping malls I have ever visited. There are 200 hundred small shops, including a Georg Jensen shop, with luxury goods to tempt you. Feel like shopping? If you ever get to Sydney, be sure not to miss this geogeous building. Photo by: Jacob Surland, www.caughtinpixels.com

It’s been a little quiet for a while on my blog. I have been busy preparing an HDR course for a photo club. It was a friend of mine, who asked if I could do a course on HDR in his local photo club, which I agreed to do. It has been really exciting to prepare such a course. I knew that people had very different skill levels, which makes it really hard to make a course. I decided on a beginners level, rather than a more advanced level and had to find out what my primary objectives should be.

Teaching is a good way of honing your skills, because you have to understand what you do more precisely, to be able to explain it. But it also requires the skill to transform what you know to understandable words and examples. Not all has this skill.

Primary objectives when learning HDR

I decided to concentrate on the true basics that form the foundation. These include:

  • How to setup the camera to take bracketing shots.
  • How to merge your photos in Photomatix Pro to get the basic
  • How to improve your photo in Photoshop (or GIMP – the free alternative).

You have to understand how to set up the camera to do the Auto Exposure Bracketing, otherwise it will be hard to do the bracketing. The most important thing is, to remember to use Aperture mode on the camera. If you use Shutter mode, you will end up with exposures with various depth of field, and therefore not identical and unusable for HDR processing.

The HDR software Photomatix Pro is a new tool for most people and luckily it’s not too complex to learn – some of the sliders are difficult to explain what they actually do, but what makes it fairly easy, is that you can just move the sliders back and forth and see what they do. This helps a lot.

What’s important to learn from Photomatix, is to bring contrast into the photo and use the ‘Lightning adjusts’. The naked merged HDR photo is flat and dull. By introducing contrast the photo starts to pop. And the lightning adjustments is a part of the Tone Mapping algorithm, which changes the light in the photo. This can change the mood of your photo quite dramatically, but you have to be careful not to make something really nasty, which certainly is possible. The goal is to make something pretty. What’s ‘pretty’ is subjective and is something you learn over time.

The difficult part is to understand the overall workflow and how to work with layers in Photoshop. What comes out of Photomatix Pro, does not really qualify as a final images. You have to make the last 20%-30% by mixing parts of the original images into the output image from Photomatix. You do that by using Layer Masks in Photoshop: Layers is, if not a strange concept, at least something that you have to learn how to work with and how to master. A number of shortcut keys, ways of working with opacity, pen of different sizes, white and black masks. It’s something you have to learn, but when you master it, you do “get it” you can use the same principles for many things.

I have learned a new way of working with layers. It’s kind of inverted. Instead of working on “white” masks, I have started to work on “black” masks. The huge advantage is that I don’t have to merge layers all of the time and this allows me to backtrack or change what I have done. This I can’t do, if I merge the layers. I will revise my HDR and Blending tutorials for this type of merging soon.

Using this inverted mode of working with Photoshop Layer Masks I find much easier to explain, which is a good thing, as I like to teach.

What would be the next steps

What 2½ hours let you do, is to run through the basics of an HDR work flow, but not really touch the more advanced topics, like double tone mapping etc. This would require more time.

I hope to get to do more of these HDR classes. It’s really something that I both learn a lot from but also find to be great fun!

About the photo

The photo is taken in the Queen Victoria Building in Sydney. A place that my friend who invited me the photo club also visited, just 25 years earlier. Photography takes you to many different paths, in different times, yet places stay the same, more or less.

Updated article on compositional rules


Warning: Undefined array key "multiauthor" in /var/www/caughtinpixels.com/public_html/wp-content/plugins/post-layout/plugin.php on line 114

Warning: Undefined array key "mobile" in /var/www/caughtinpixels.com/public_html/wp-content/plugins/post-layout/plugin.php on line 352

Desolate Central StationCanon 5D Mark III, Canon 17-40mm, ISO 400, 20mm, f/13, 5.0 sec

This is one of my early photos. It’s an HDR photo made of 5 images in Photomatix Pro and afterwards merged in Photoshop.

I have just updated my article on composition. I have updated the photos and added the missing photos and then I have added a 13th rule, which I use a lot when I take my photos these days.

Have a look at it here.


Chicago the day after Sct Patricks day


Warning: Undefined array key "multiauthor" in /var/www/caughtinpixels.com/public_html/wp-content/plugins/post-layout/plugin.php on line 114

Warning: Undefined array key "mobile" in /var/www/caughtinpixels.com/public_html/wp-content/plugins/post-layout/plugin.php on line 352

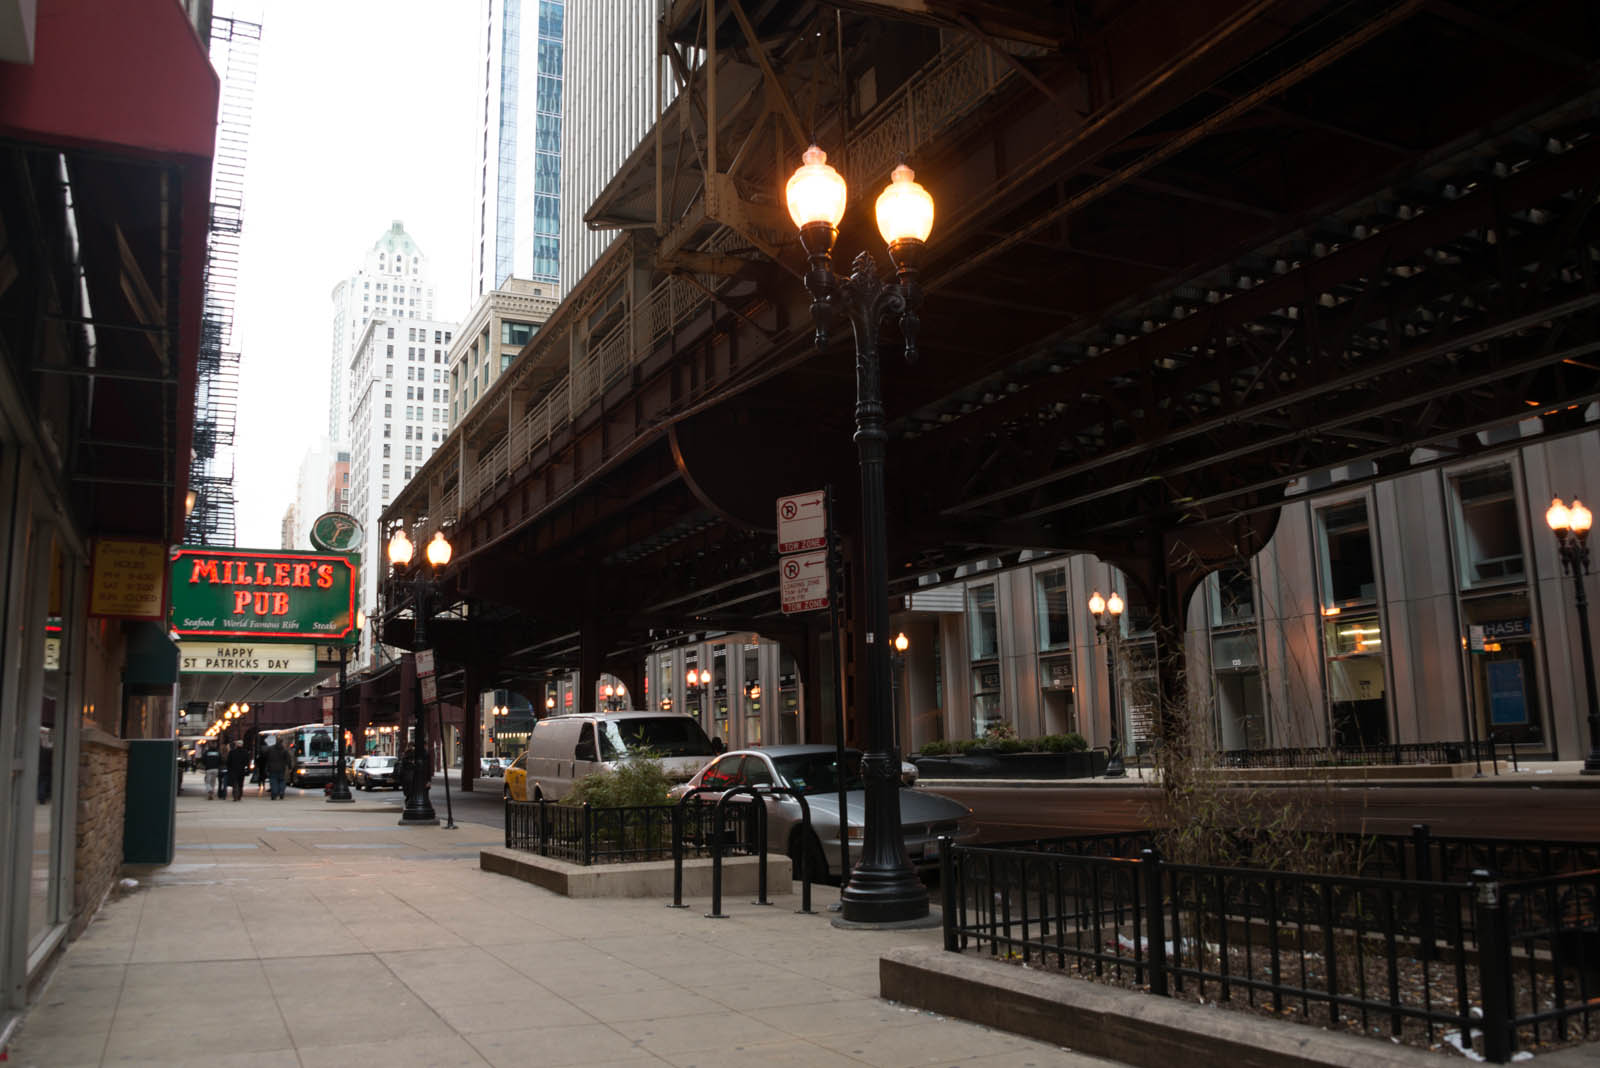
I arrived at Chicago at Sct Patricks day without knowing it. I knew about the basics, it's an Irish tradition, and that the river is colored green and there is a great party in the city of Chicago. I realized it when I saw people walking around with green hair and funny hats and everybody was so happy. I shot of the Millers Pub in Chicago with their Sct Patricks Days sign on. Photo by: Jacob Surland, www.caughtinpixels.com

By chance I arrived in Chicago on the eve of Sct Patricks day and everybody wore green hats or hair and the city was partying. I of course have heard of this legendary day and I was also looking forward to see if they actually did color the river green. On my way up to the river I walked under the elevated railway and came by Millers pub and took a few photos. Later I got to the river and they sure had colored it green or rather super green.

About the processing of this photo

This one came out as a surprise to me and though it is a bit extreme, I like it. It’s much more like a painting Sometimes Photomatix does wonders for you. I processed this photo quite different than I usually do. I experiment with the things I learn and mix them together. This one is a cross-over of making HDR-like photos in Lightroom and then doing a real tone mapped HDR in Photomatix.

Initially I had 7 shots from -3 to +3. This is the -1 unprocessed:

Millers pub - unprocessed original

As you can see it is quite flat and the mood is far from the mood in the final photo. I had to shoot 7 shots, because it’s really dark underneath that elevated train and the sky is extremely bright in comparison, even though there were heavy clouds over Chicago that day.

Continue reading

Return from Autumn Workshop in the Queyras


Warning: Undefined array key "multiauthor" in /var/www/caughtinpixels.com/public_html/wp-content/plugins/post-layout/plugin.php on line 114

Warning: Undefined array key "mobile" in /var/www/caughtinpixels.com/public_html/wp-content/plugins/post-layout/plugin.php on line 352

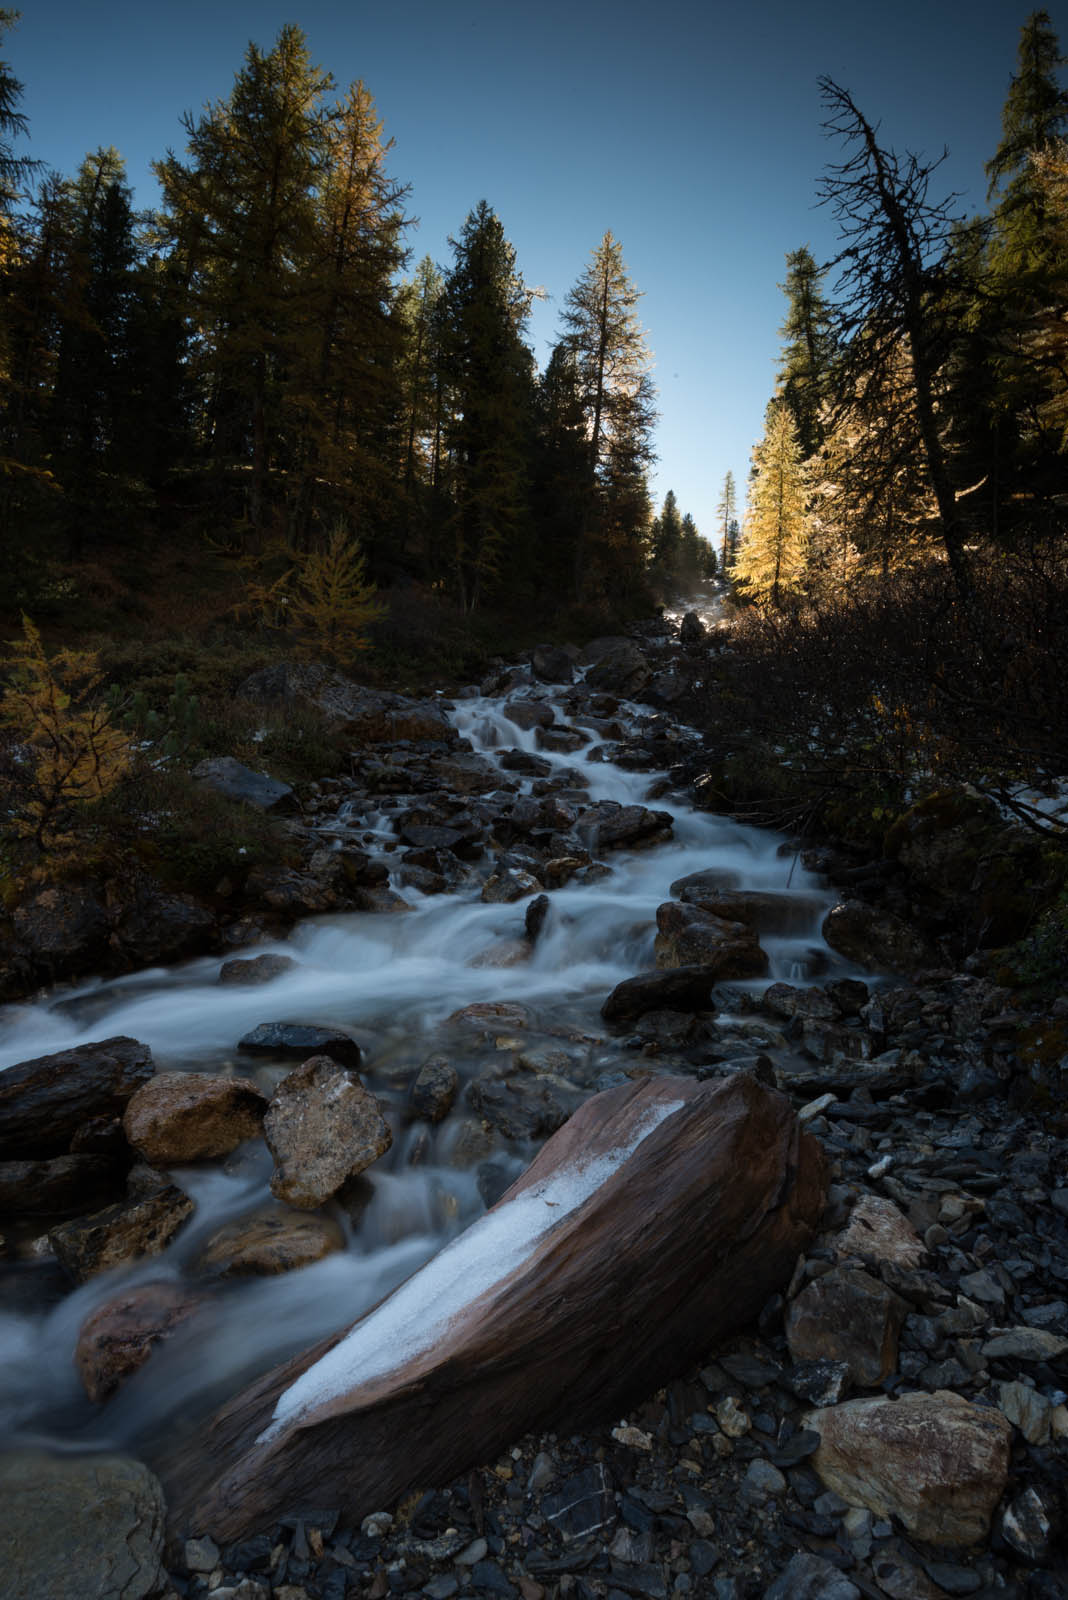
One of the gems in Europe is Queyras in France. A large national park, with outstanding nature and spectacular view points. On the way to Lac Miroir (Lake Mirror)

Nikon D800, Nikkor 16-35mm, ISO 50, 16mm, f/22, 0.8 sec

It’s been an exciting week last week. We had the most fantastic workshop with Duncan Macarthur in the alps in southern France, an area called Queyras that I had never heard about. A true hidden gem in Europe to many people.

Duncan is a fantastic photographer and has got an incredible amount of experience, ranging from wedding photographer, to more cultural photography, to hotel room photography and of course landscape and wild life photography. The latter is where he makes most of his money today.

Not only does Duncan know all of this great stuff, but he also knows how to teach it to others. A skill not everybody has, but within the first day, everybody on the workshop knew exactly what a histogram was, and what the result was if you blew the histogram in either end and more important, why the histogram is important. It was amazing to see the transformation of everybody on a workshop like this. People with very different skill levels attended the workshop, ranging from novice to more experienced, and everybody saw the same scenes with different eyes. Something that everybody learns a lot from.

I of course have brought back a ton of photos, a lot of which are experimenting photos. But I’m quite sure, that there are a some good ones among them and hopefully a few fantastic shots. The photo above was some of what I hoped for. We don’t have streams like that in Denmark and finally I got to photograph one.

We were on a great photo team, with fantastic people (thanks for a great vacation and workshop Anne, Orlando, Frank, Kate and of course Duncan and his lovely wife Fanny). We had a lot of fun and a great time together. It’s fantastic to get to know people in such an intense way around a specific topic that you share the same passion for.

Duncan’s approach to photography is quite different from where I have been moving around for the last year or so, but he is exactly where I initially wanted to be. I finally got the chance really to learn how to use my Lee filter kit and work with the different aspects of landscape photography. How to work with a subject that you have found interesting and keep working on the composition and improving it until you finally nail it.

In the post-processing class I also learned a lot and I believe that I will change the way I work in many ways. The photo above is a single exposure and Duncan will probably think, it’s a bit over the top. Duncan’s approach is to get something that looks absolutely natural, where I often go more artistic ways. I will definitely try to do a few photos with Duncan’s approach and put out my tutorials on the photos that I make. Maybe I will even try to post-process the same photos with a realistic approach and a more artistic approach and see what comes out of it.

The photo above is shot with a 0.6 (2 stop) neutral density gradient Lee filter. The filter darkens the sky, to avoid blowing out the sky and getting an all white sky.
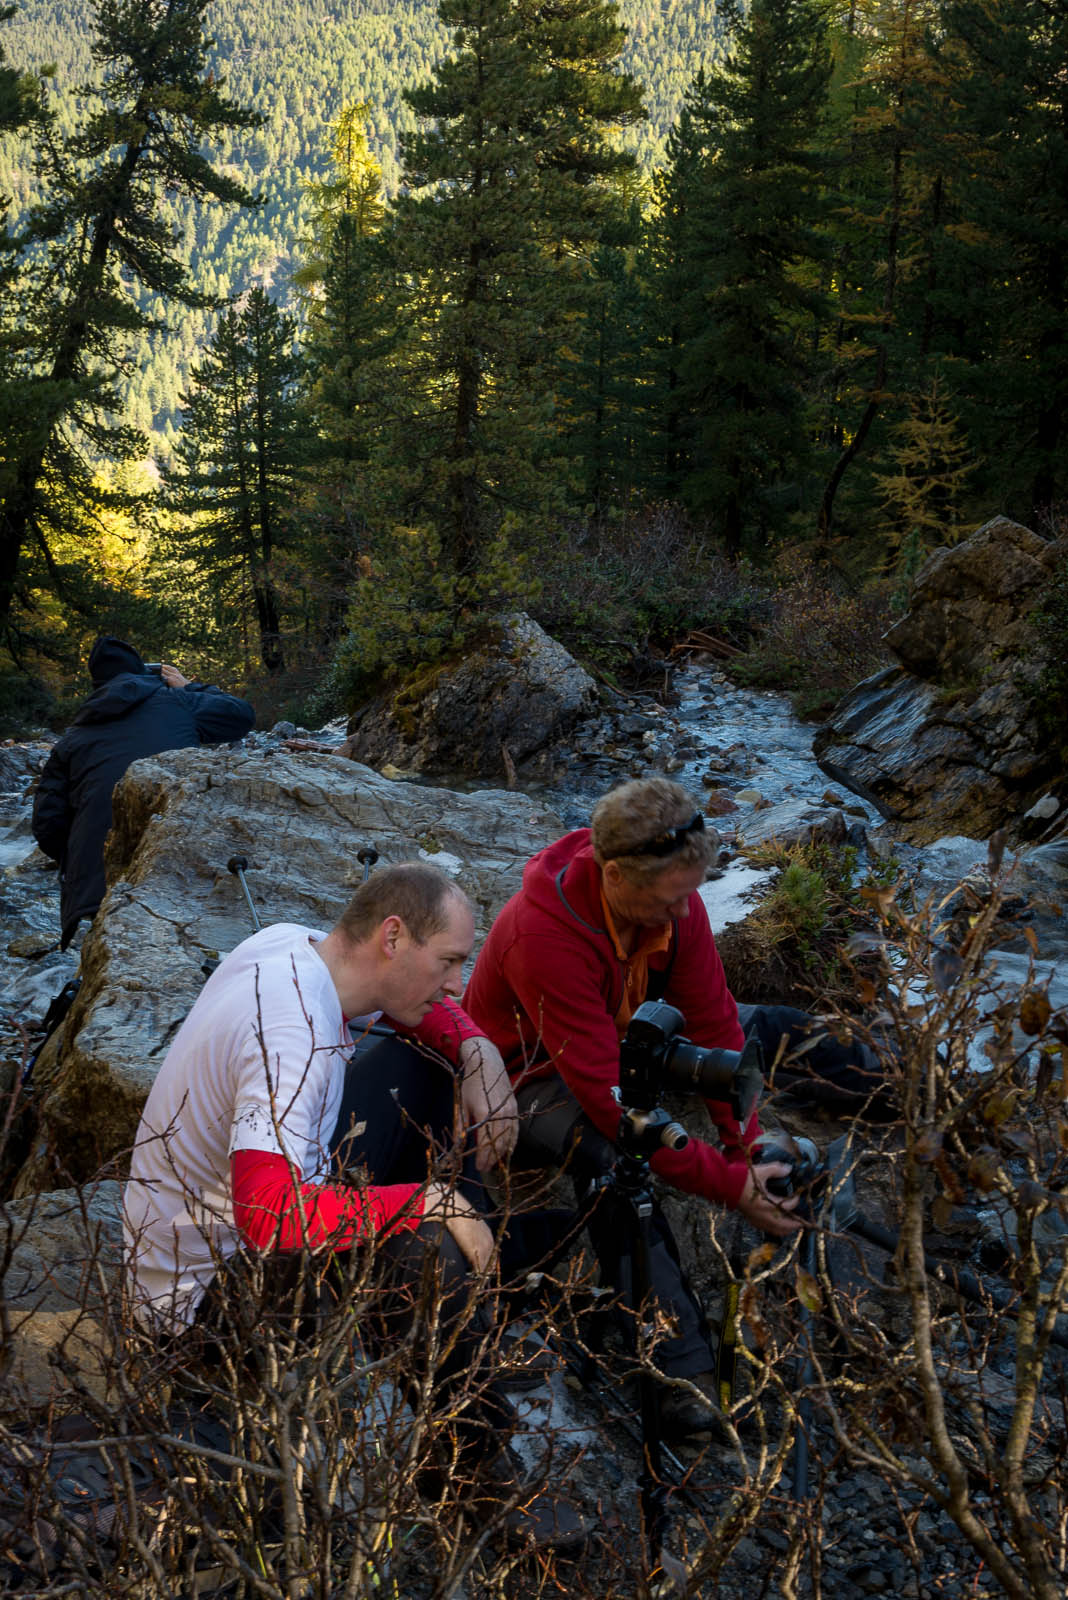
Duncan Macarthur and Jacob Surland taking photographs of a stream

I’m sitting on the left hand side in the white t-shirt and Duncan Macarthur on the right hand side. In the background you can see Orlando.

The post-processing is done in first in Lightroom. First I brought in a little contrast by adjusting Highlights, Shadows, Whites and blacks. As you can see the original looks too flat:
Stream to Lac Miroir - before

The values I used are:

Exposure: +0.36 – The image is slightly too dark.

Hightlights: -50

Shadows: +50

These two even out the shadows and the highlights, and makes it even more flat.

Whites: +31

Blacks: -10

Blacks and white brings the contrast into the photo. Careful not to go to extreme.

In Photoshop I added more light to the water and added more contrast to the stones, to make them pop out of the water. I also corrected the perspective. Later I will post a tutorial on the the Photoshop process, because it’s quite different from what I normally do.

Compared to many of the other photos I have done, this is a fairly light post-processing.

You can also visit Duncans website: www.duncanmacarthur.com.